French
 Danish
 Swahili
Welcome To New Version OF DADORG
(Vendor Guideline On Dadorg system)
How to register-
1. Open the new dadorg by typing this url in web browser http://dev.dadorg.com/
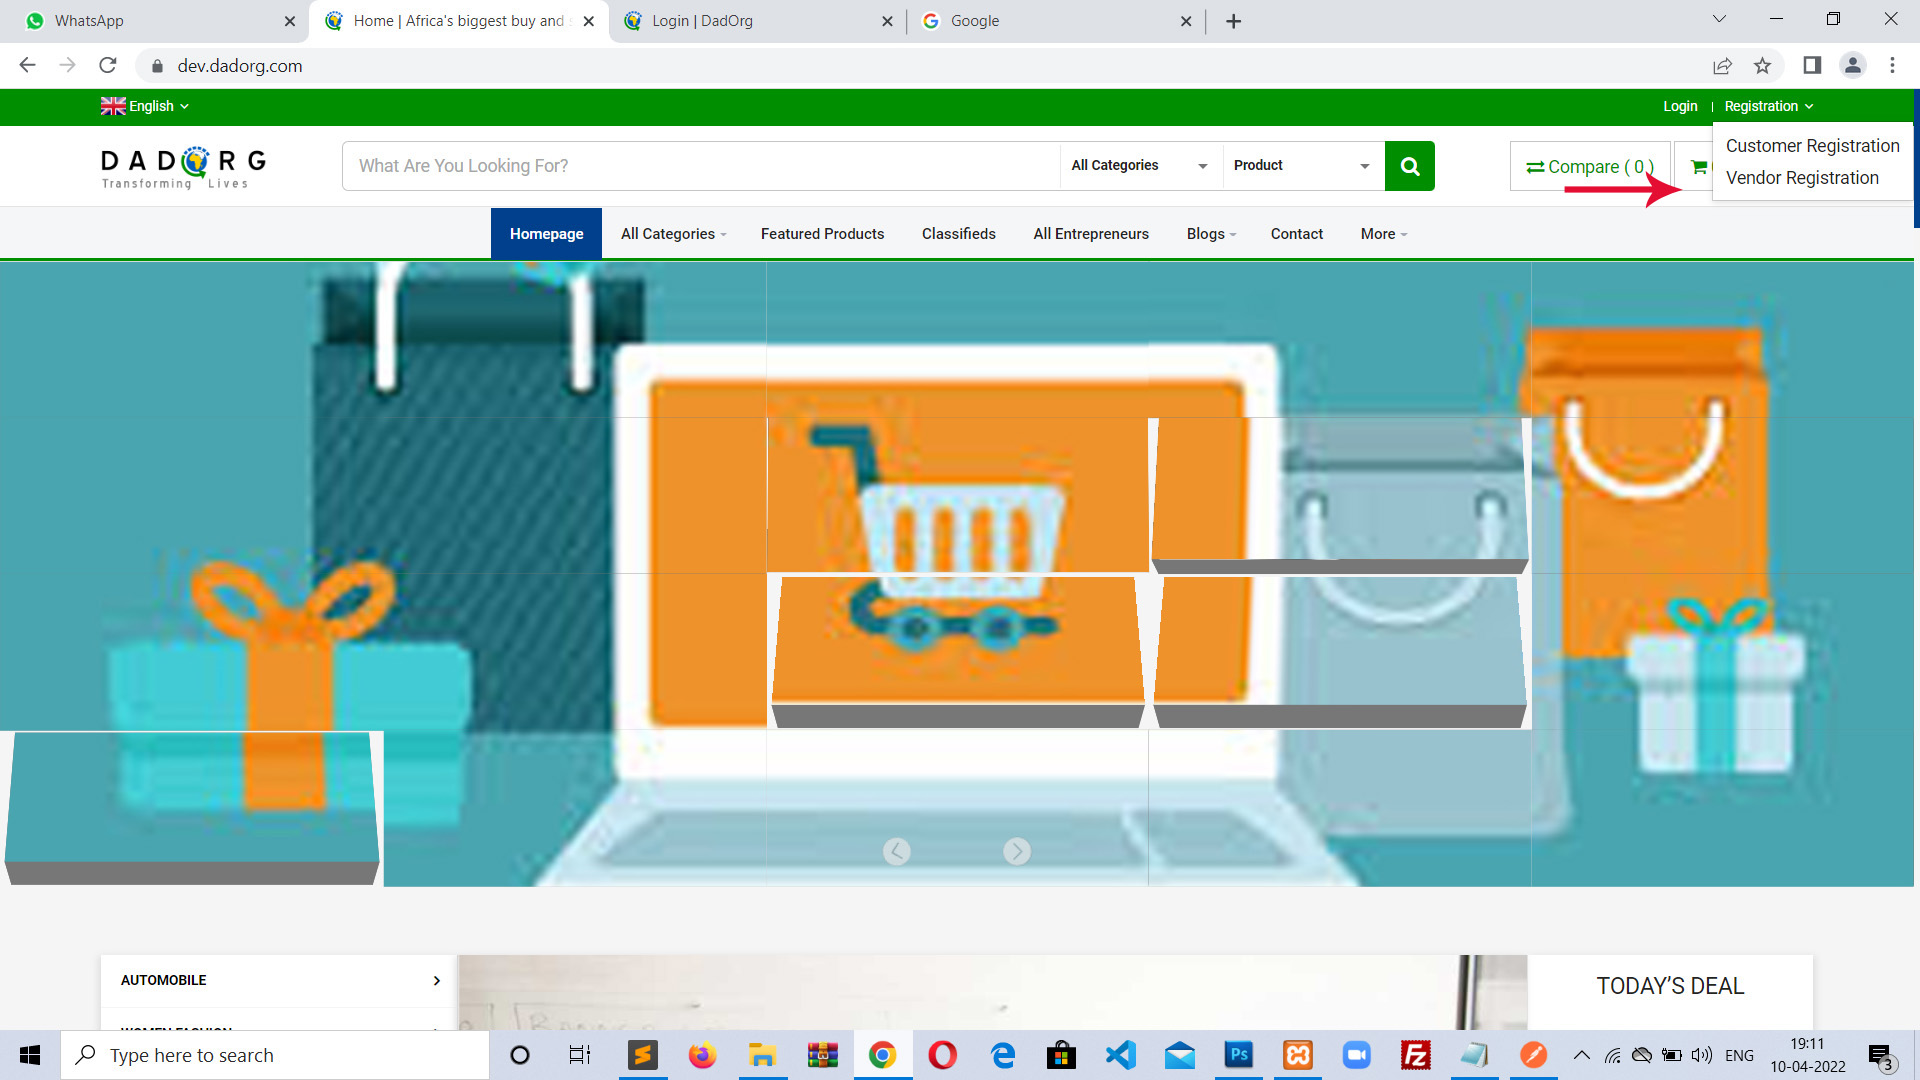
2. In top right corner of screen there is an option “Registration” click it, you will see a dropdown. Select “Vendor Registration”
3. You will see a form on your screen. Fill that form with all information about you correctly. For example Name, Email Company name (Name that will show on product detail), password, address, country, state & city etc.
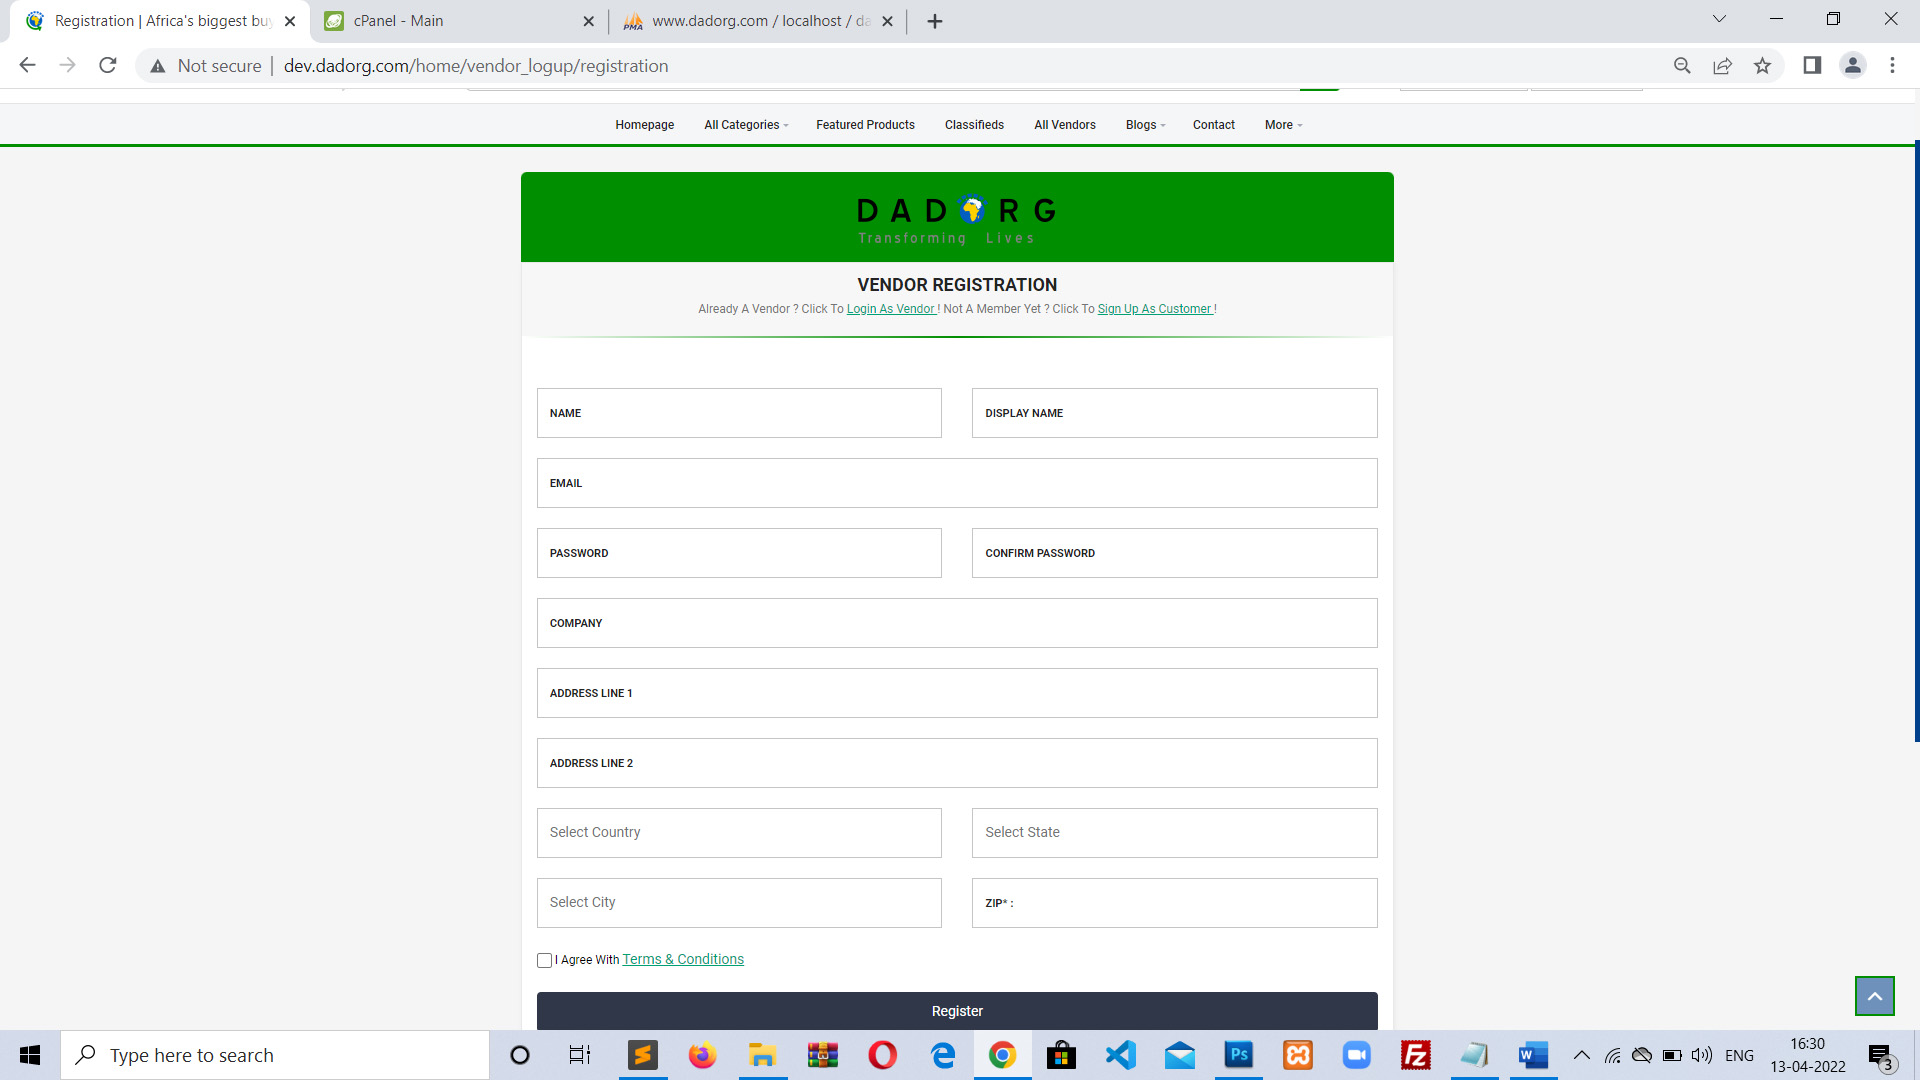
Then accept the term & conditions of dadorg by checking the tick box and then click on “Register” button at bottom.
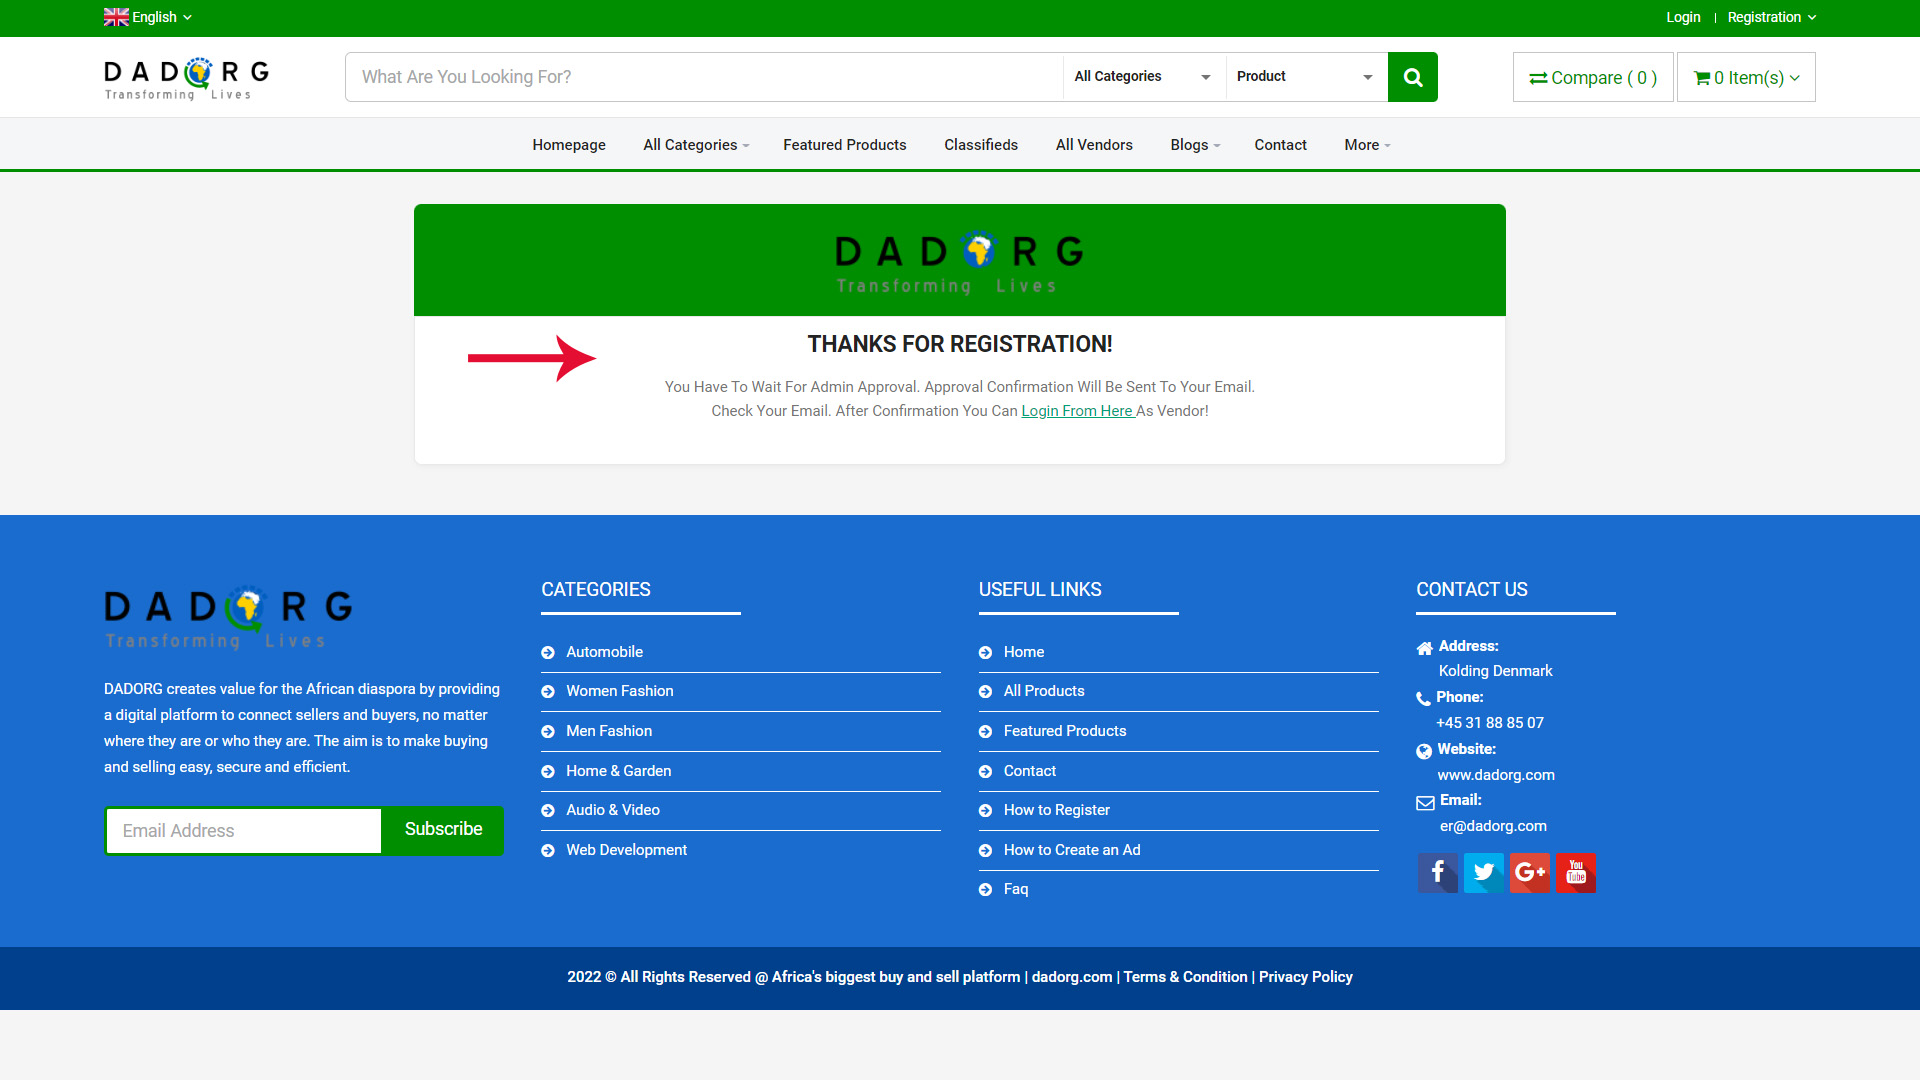
Next screen will be success screen. Vendor account need admin approval to be active. After admin approval you will receive an email on registed email address. And After approval you can login to vendor account by this link: http://dev.dadorg.com/vendor
How to Login-
1. To login into your account, go to this link http://dev.dadorg.com/vendor
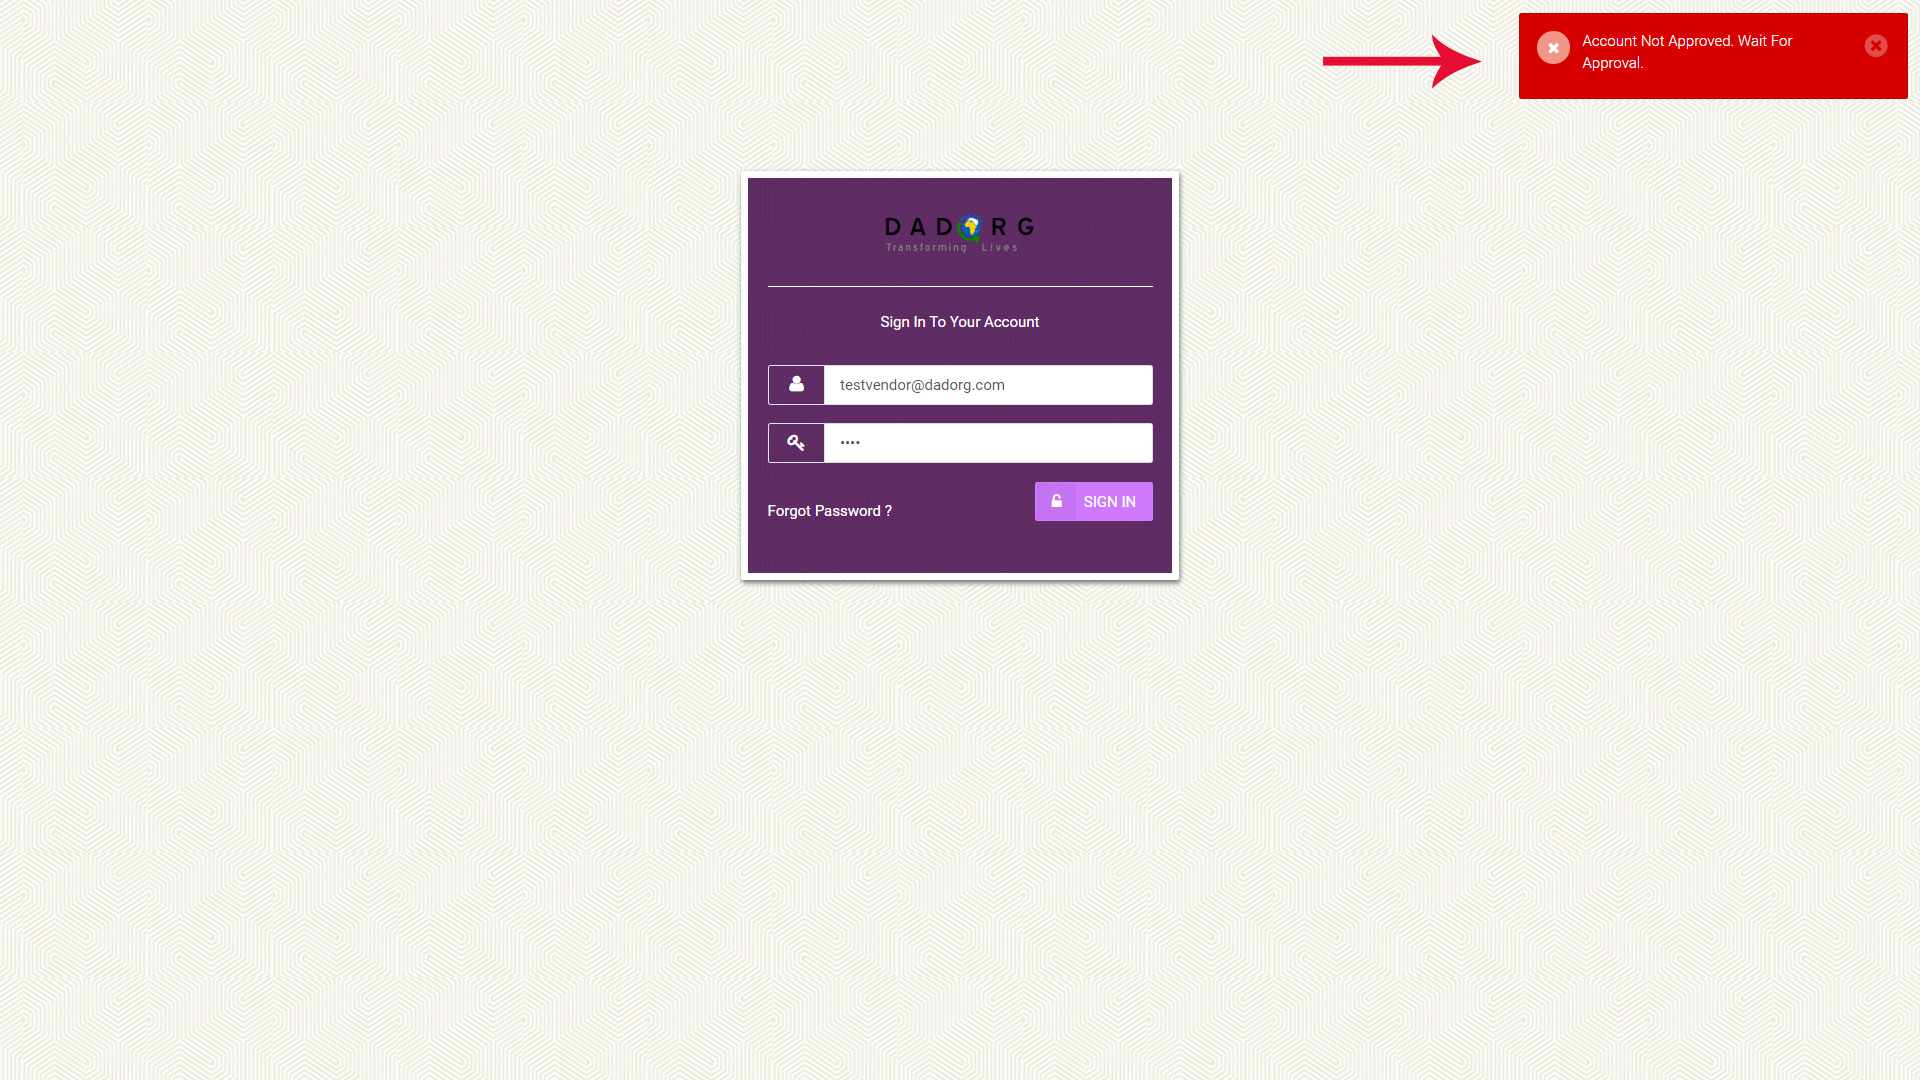
>> If your is not approved by admin and you try to login then you will see screen like this
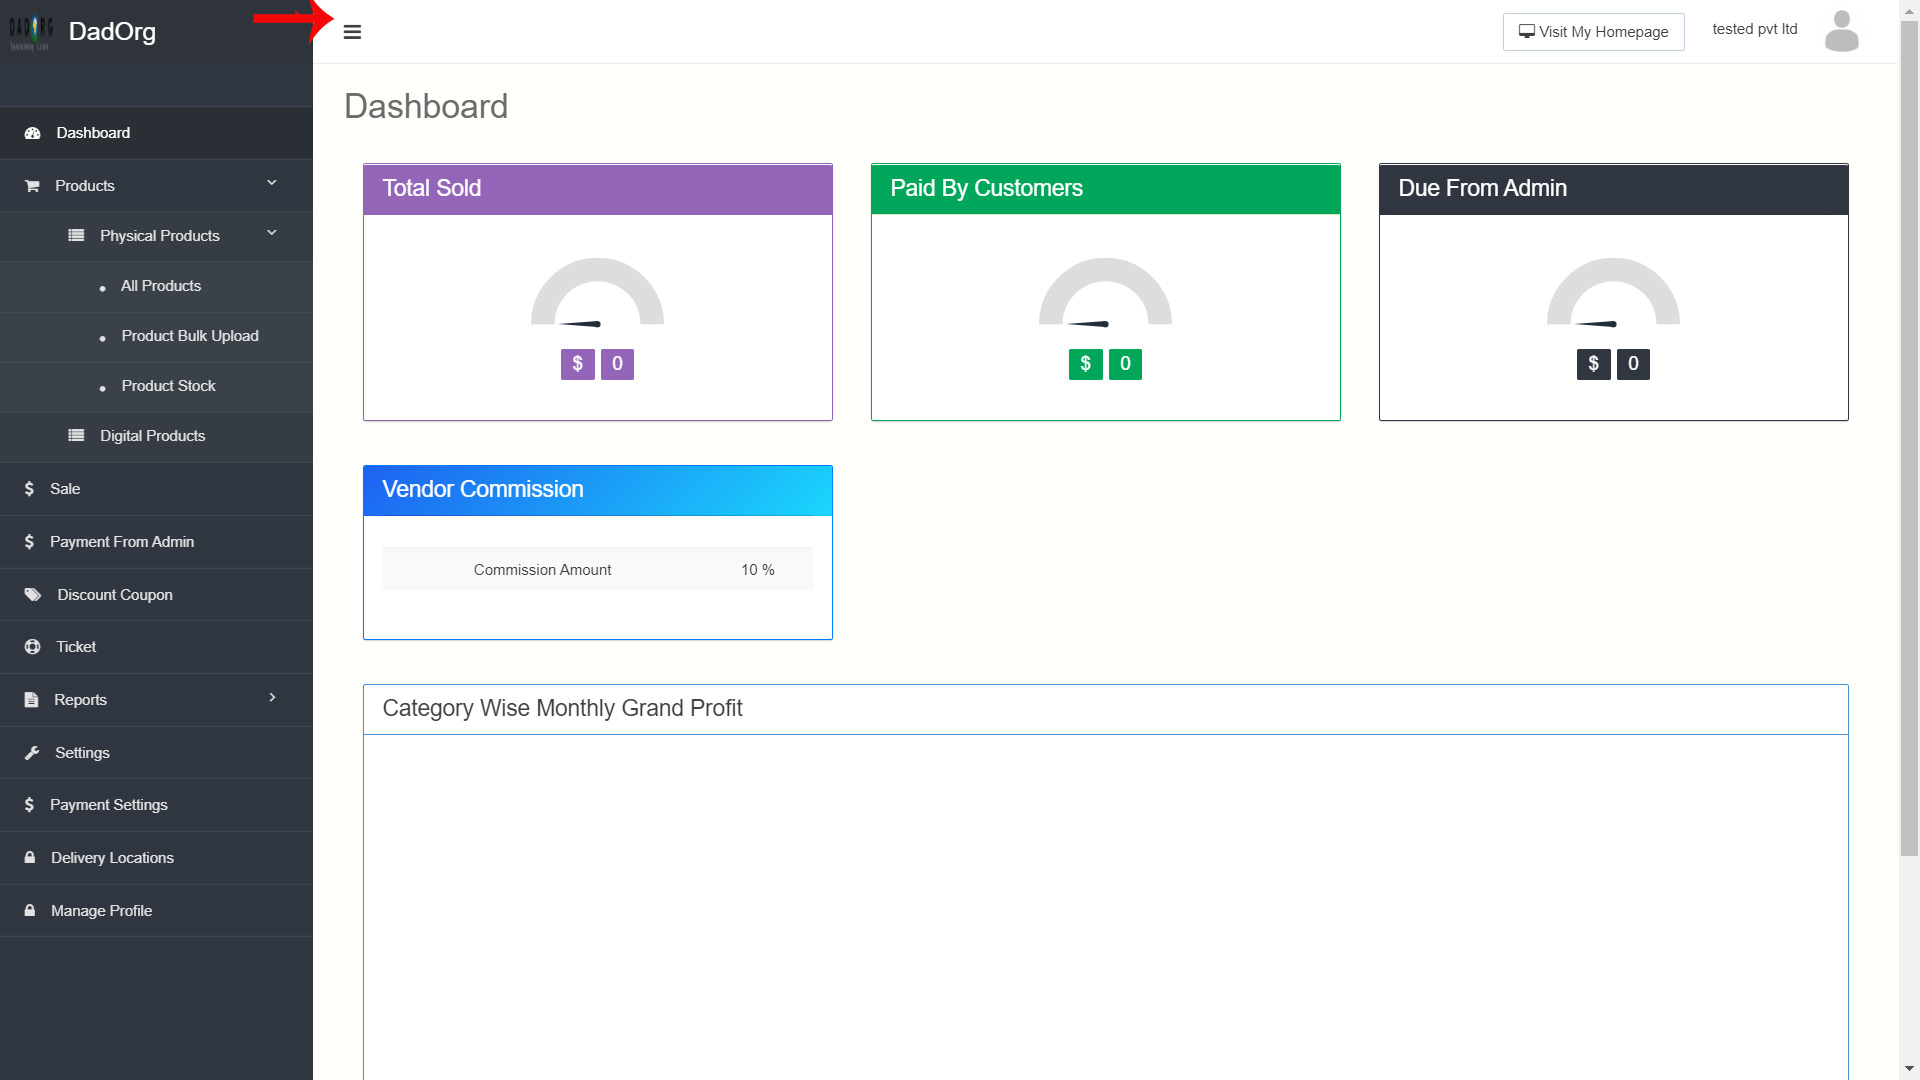
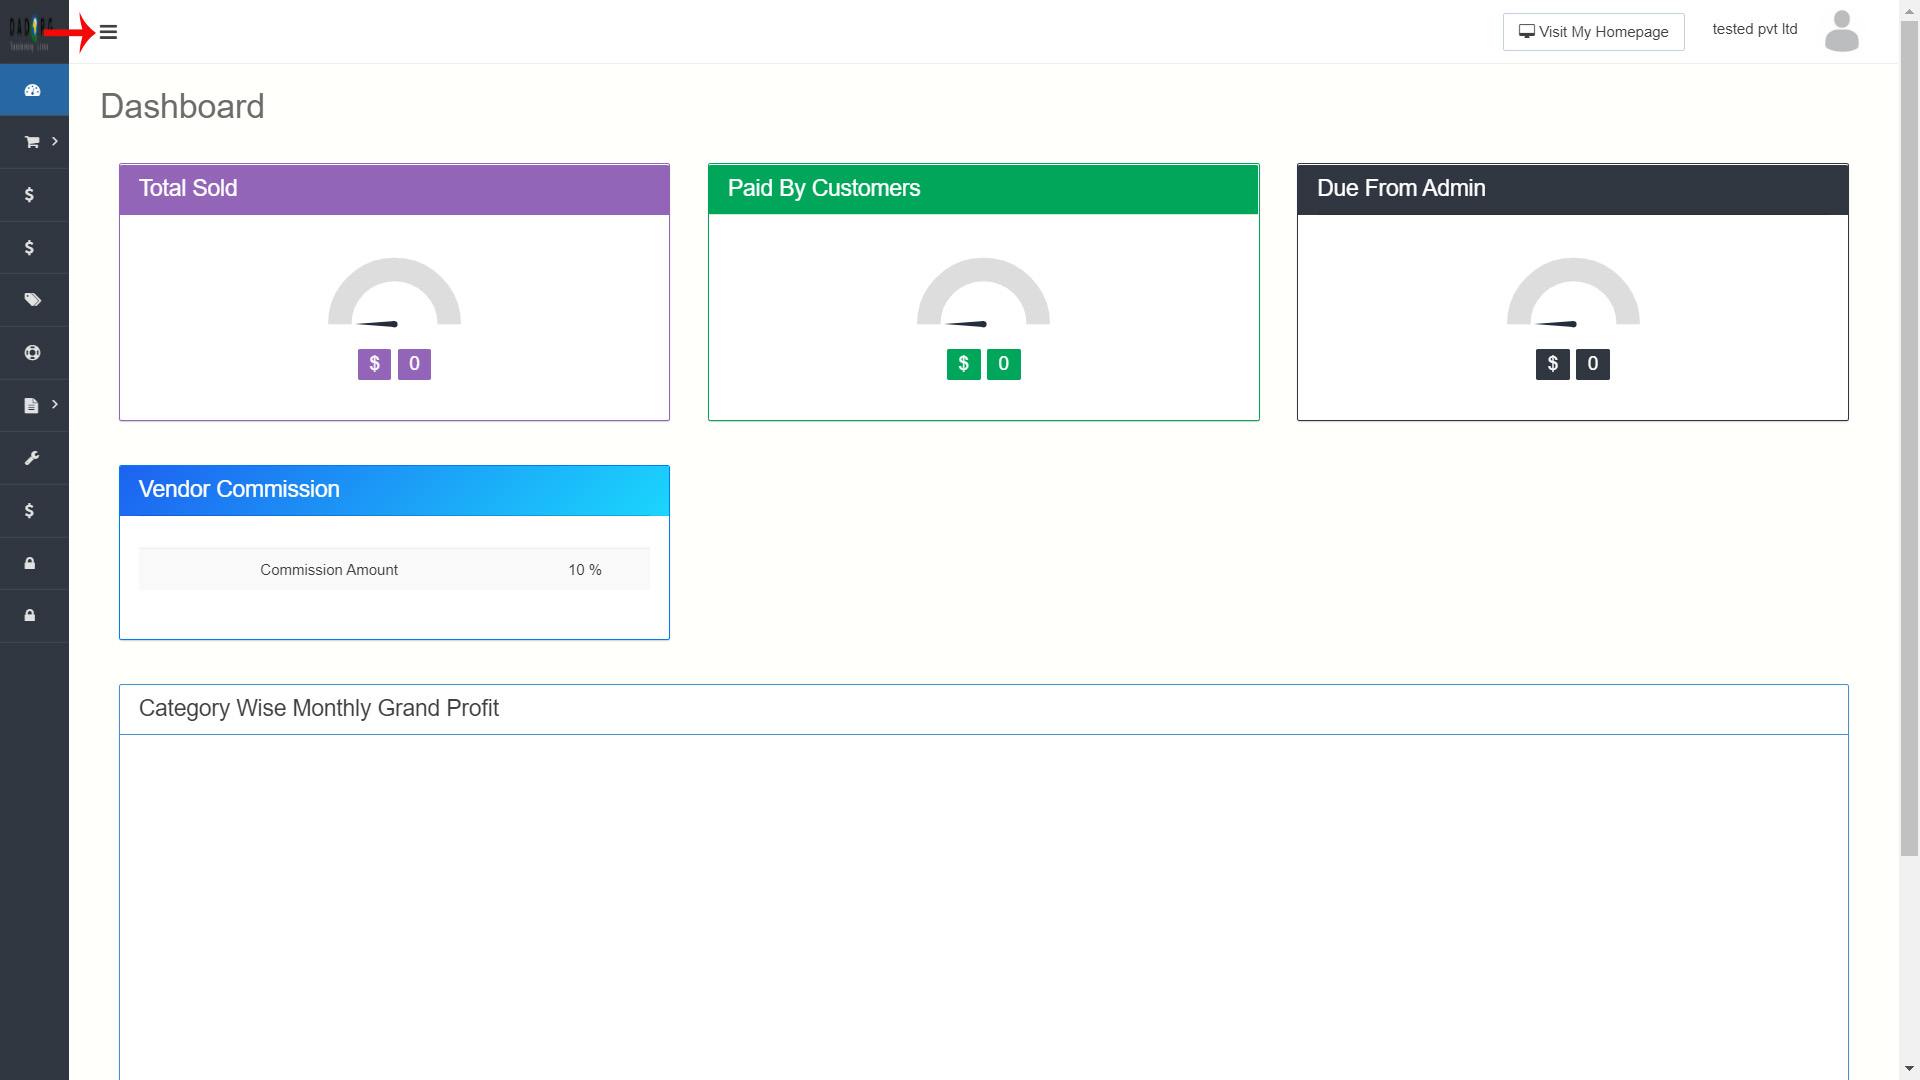
>> If your account is approved by admin then after login your screen will look like this:

>> This is dashboard. Here you will see overview of total sell, paid by customer and Due balance to admin etc.
Vendor Dashboard Features-
1. Dashboard: This is main screen of your profile. It has overall information of your profile. There is toggle menu button besides the left menu section. (Indicated by red arrow.) You can minimize & maximize left menu by clicking this.
2. Products:
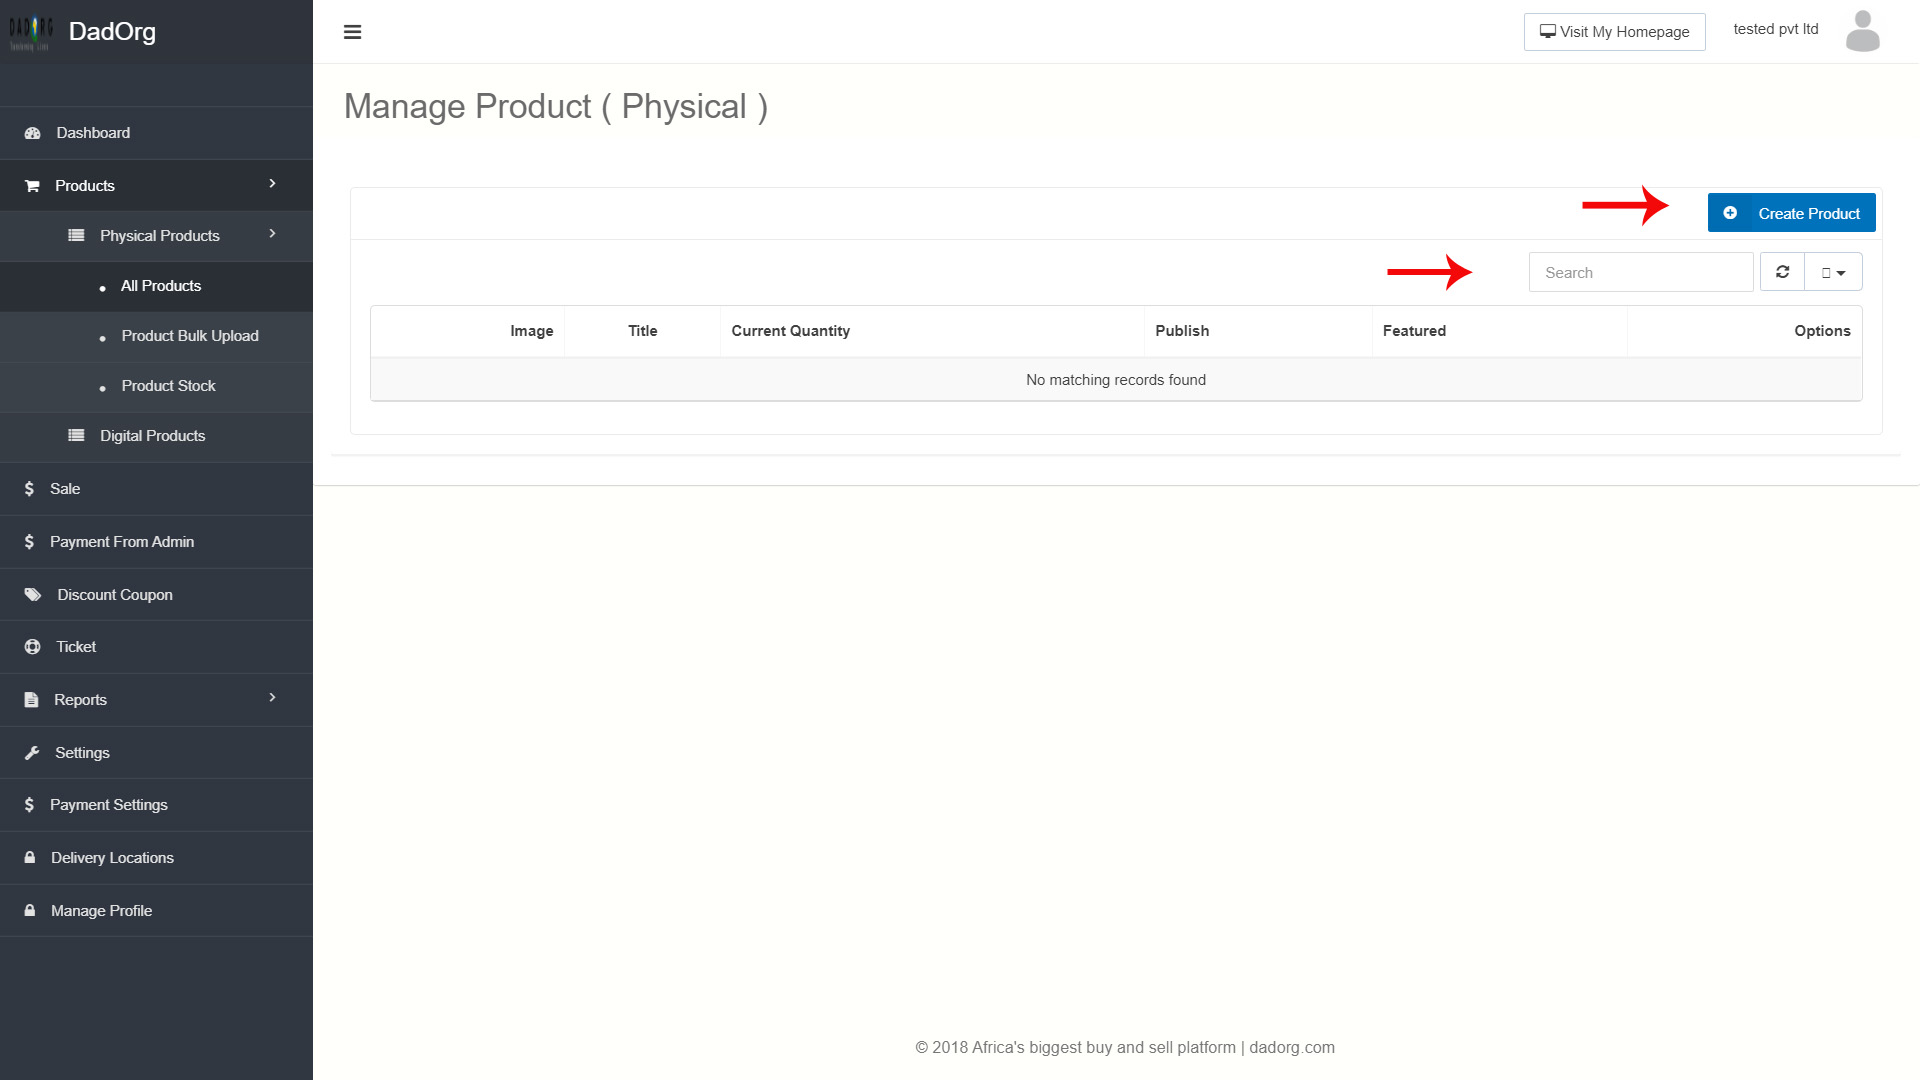
A) All Products: All uploaded products will be listed here. You can create new product by “Create product” button in right side. There is also option for search the product in listing.
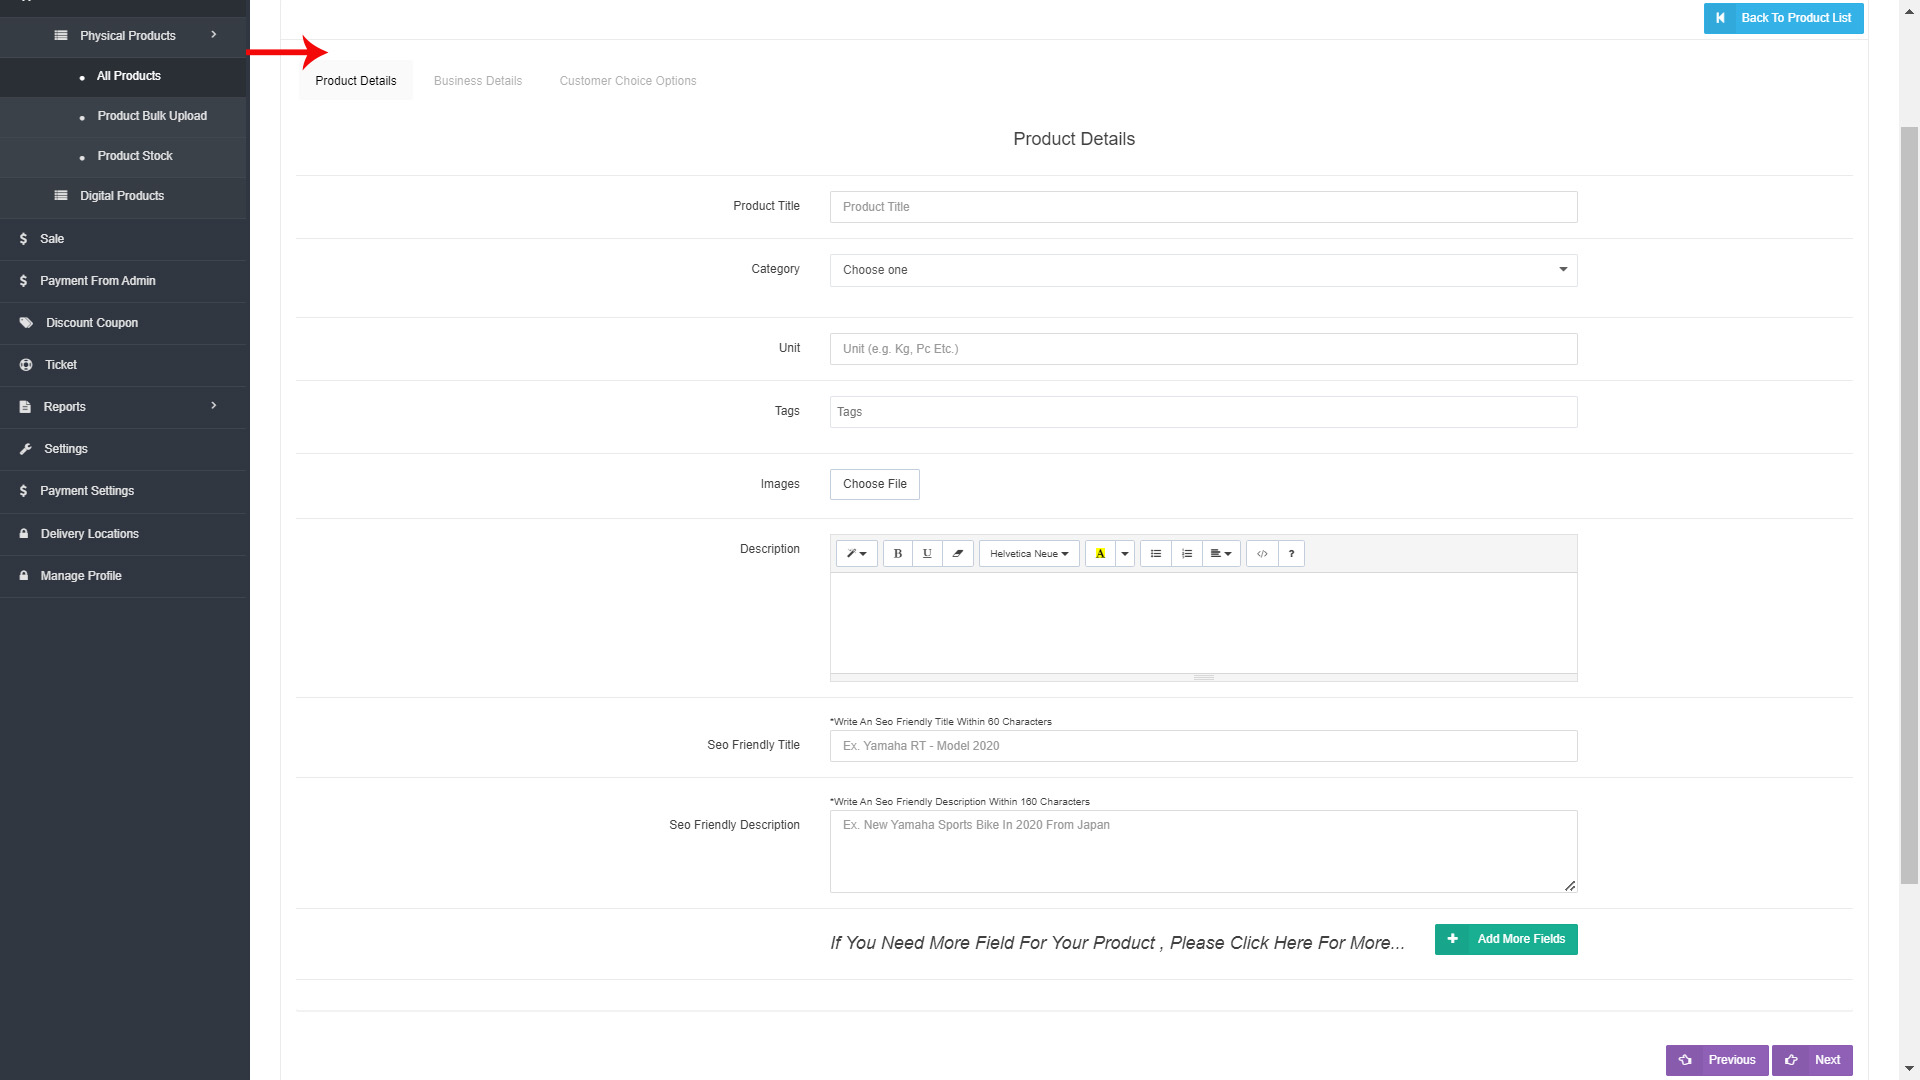
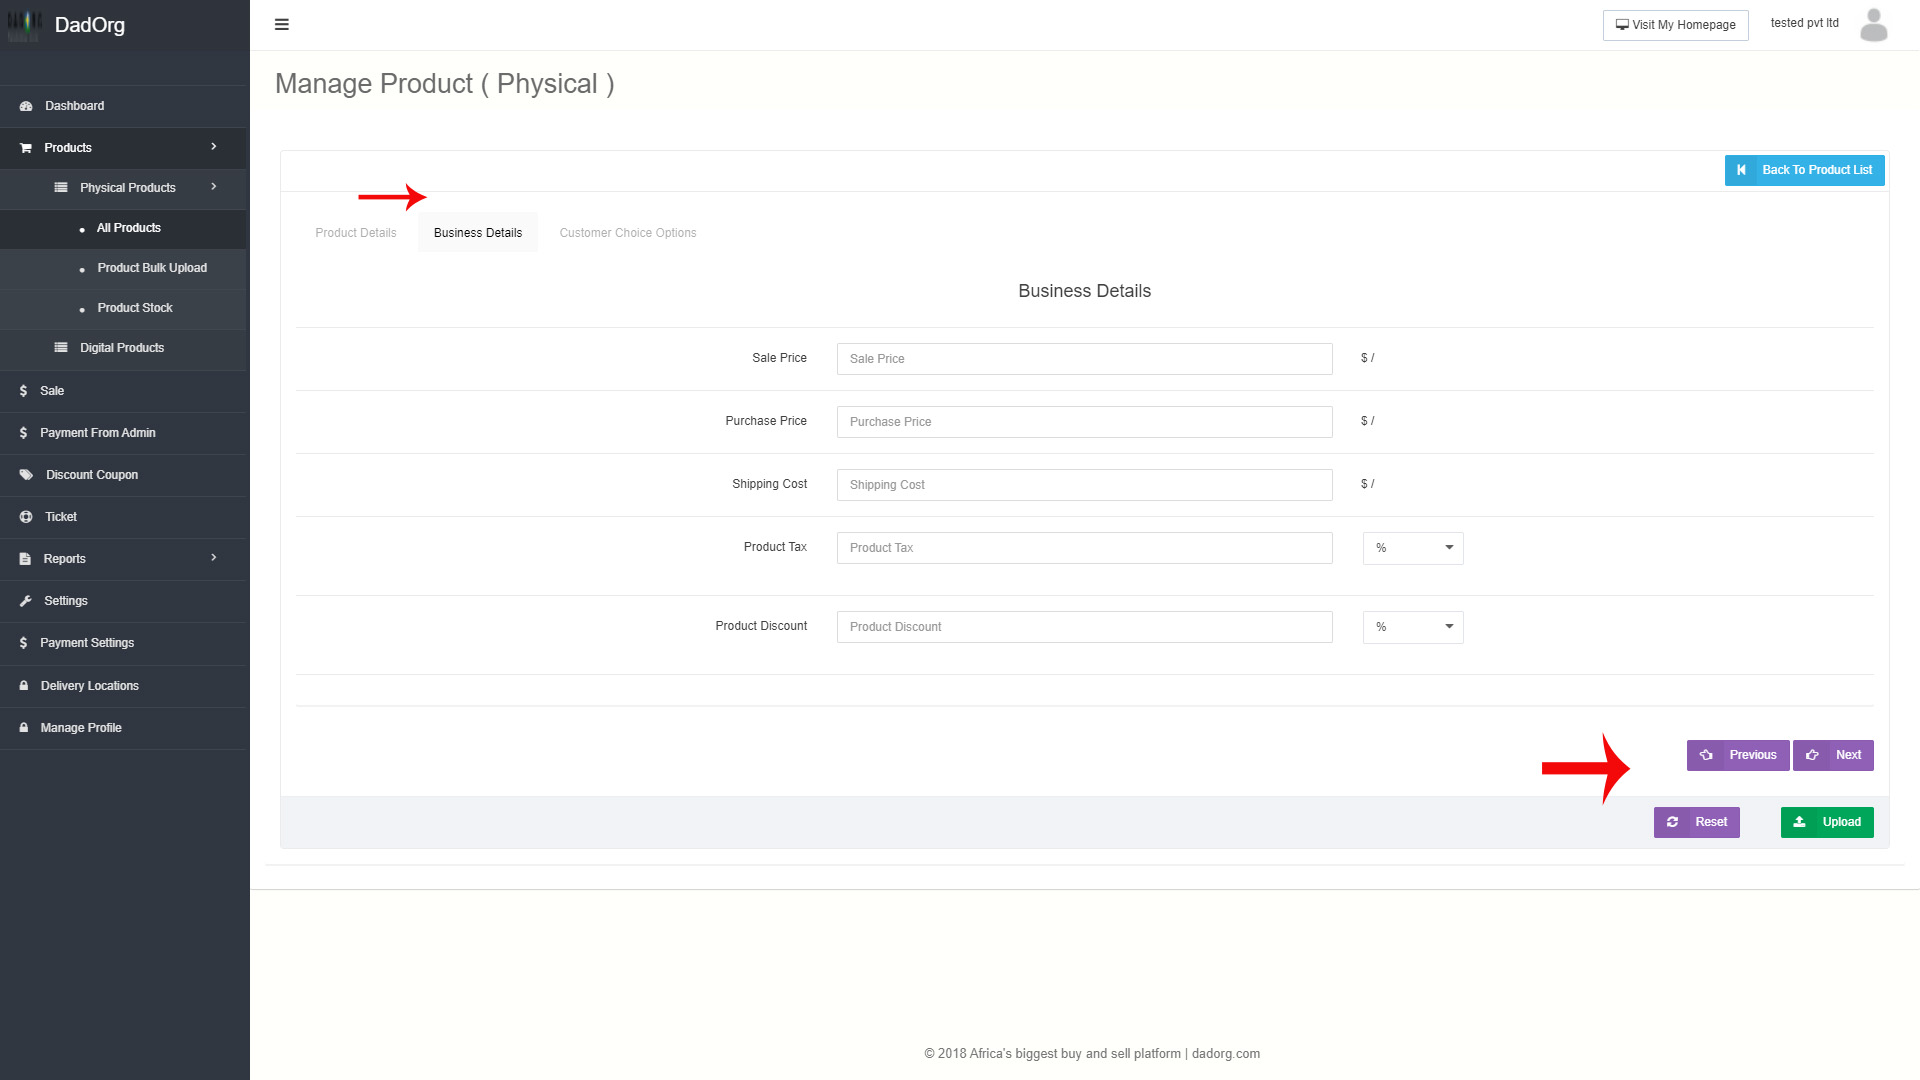
>> Create product : there 3 parts of product details to fill. Product Detail, Business Detail & Customer Choice Options.
Product Detail- Here you can fill all details of product like name, category, sub-category, brand, images, description, unit (kg , Pc etc: here kg for the products that will be sold by weight and pc refers for pieces so Pc for products that will be sold per piece) and SEO friendly title & description that will show for your product in google search.
Business Detail- This part has details like product price, sale price, tax, Shipping Cost, discount etc.
Customer Choice options- here you can one or more colors for your product if your product has more colors. Also if you want to more options to product that customer should choose before purchase then you can click on “Add Customer Input Options”.
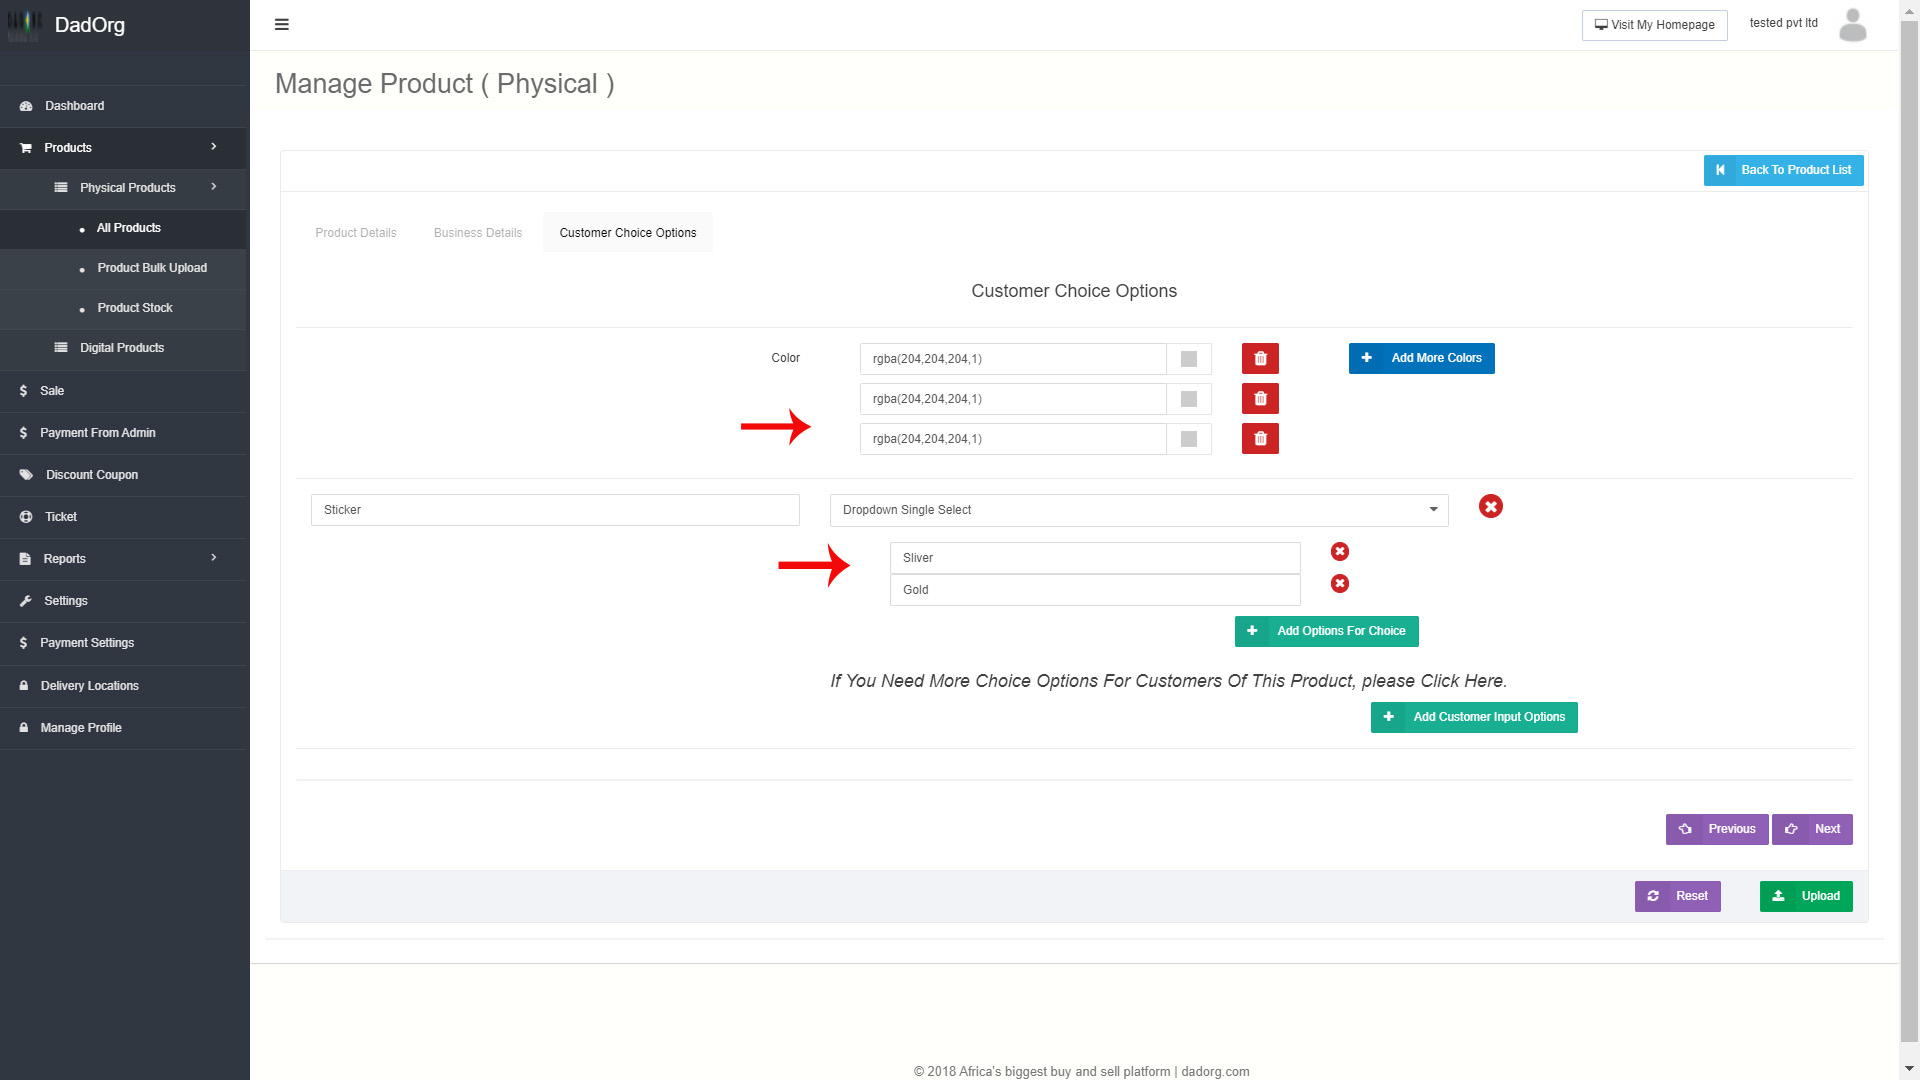
Here you can add more color and also remove them. To Add Customer Input Options you need to select field type text, dropdown or radio button. Text field for simple 1 input, dropdown is for to select anyone option from provided options so to add options for dropdown there is a option for add values for dropdown. Same for radio button you need to add radio button options.
After that click on “Upload” button to save product. Now you will added product is showing in listing like below:
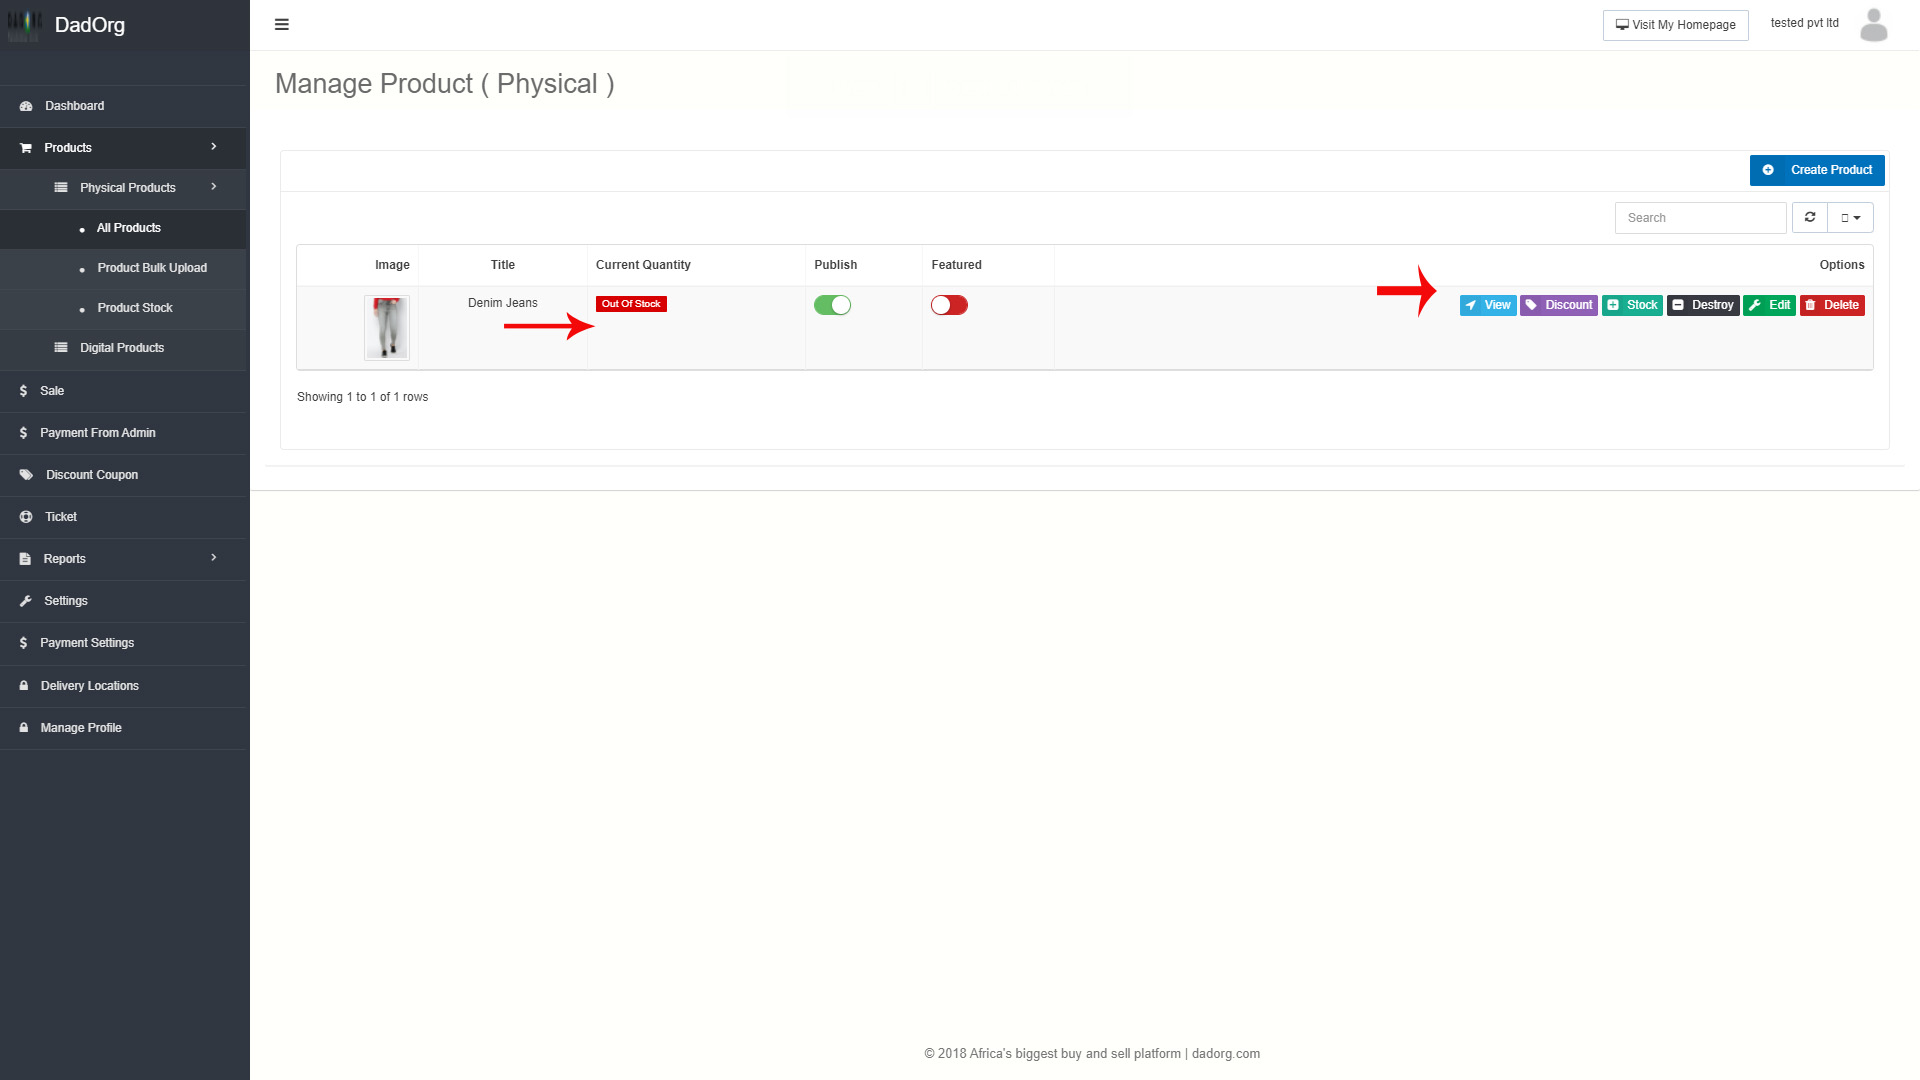
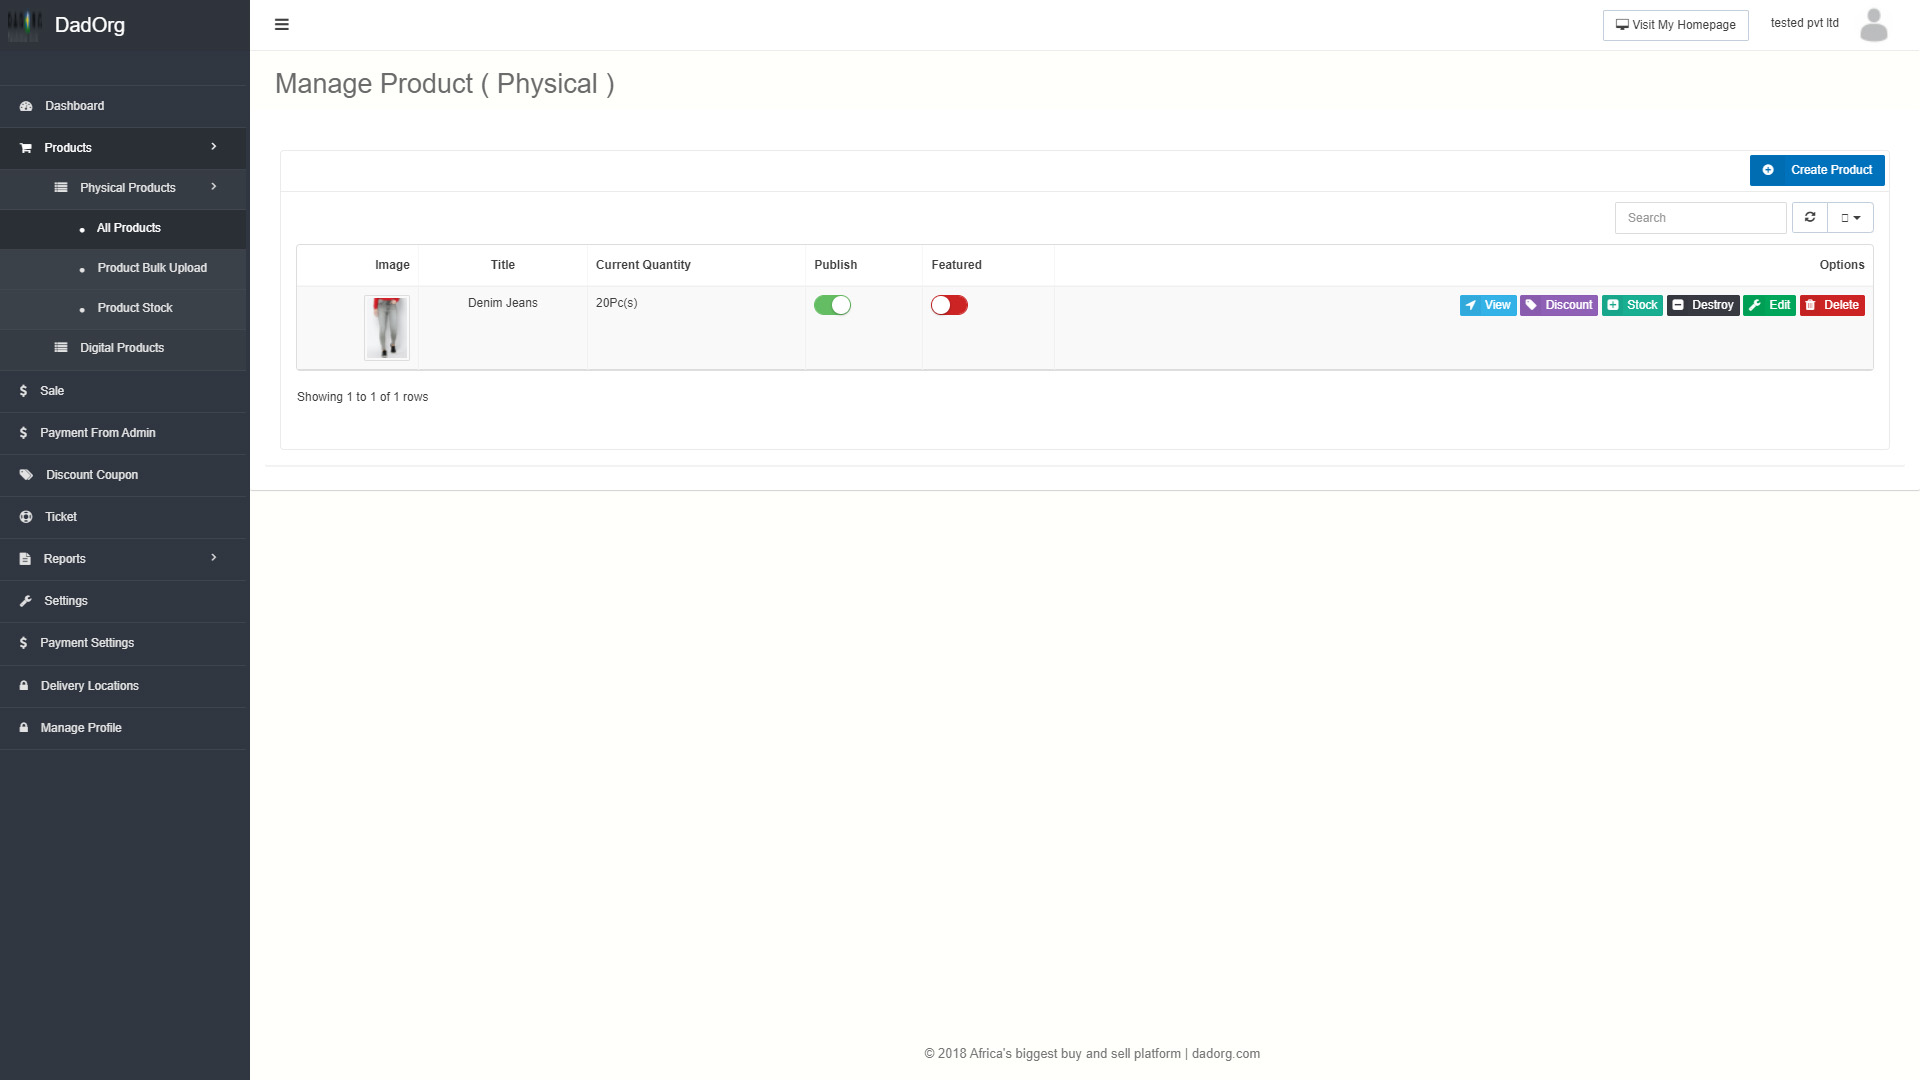
Here you can see it is showing “Out of stock” because you did not added stock/quantity of product. To add stock click on “Stock” button in right side. There are more in right for view, edit, delete product.
Stock screen will look like this-
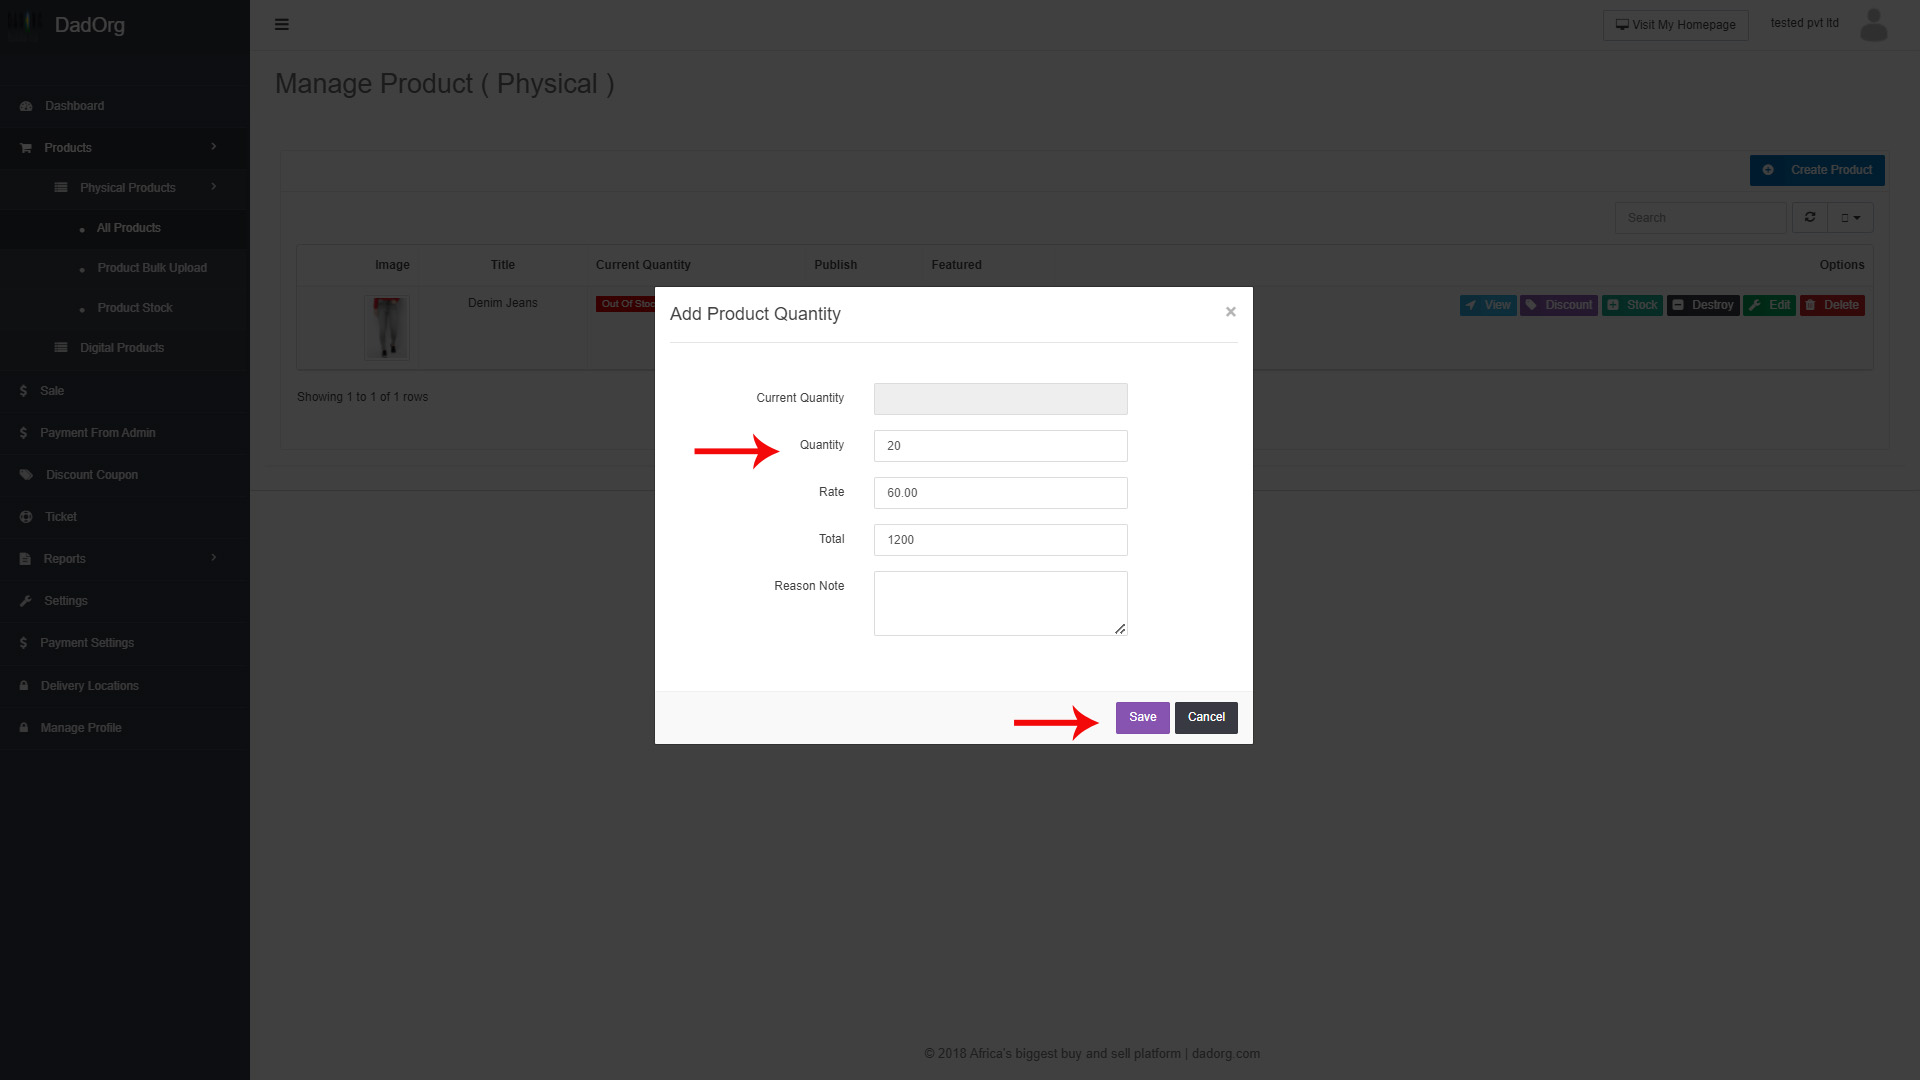
Add quantity and click “Save” button. Now you will following screen:
B) Product Bulk Upload: You can upload products in bulk but for this you need to follow instructions for this as shown in below screen. You need to create file according to instruction to upload. You can see a sample example file to upload products. You can check here.

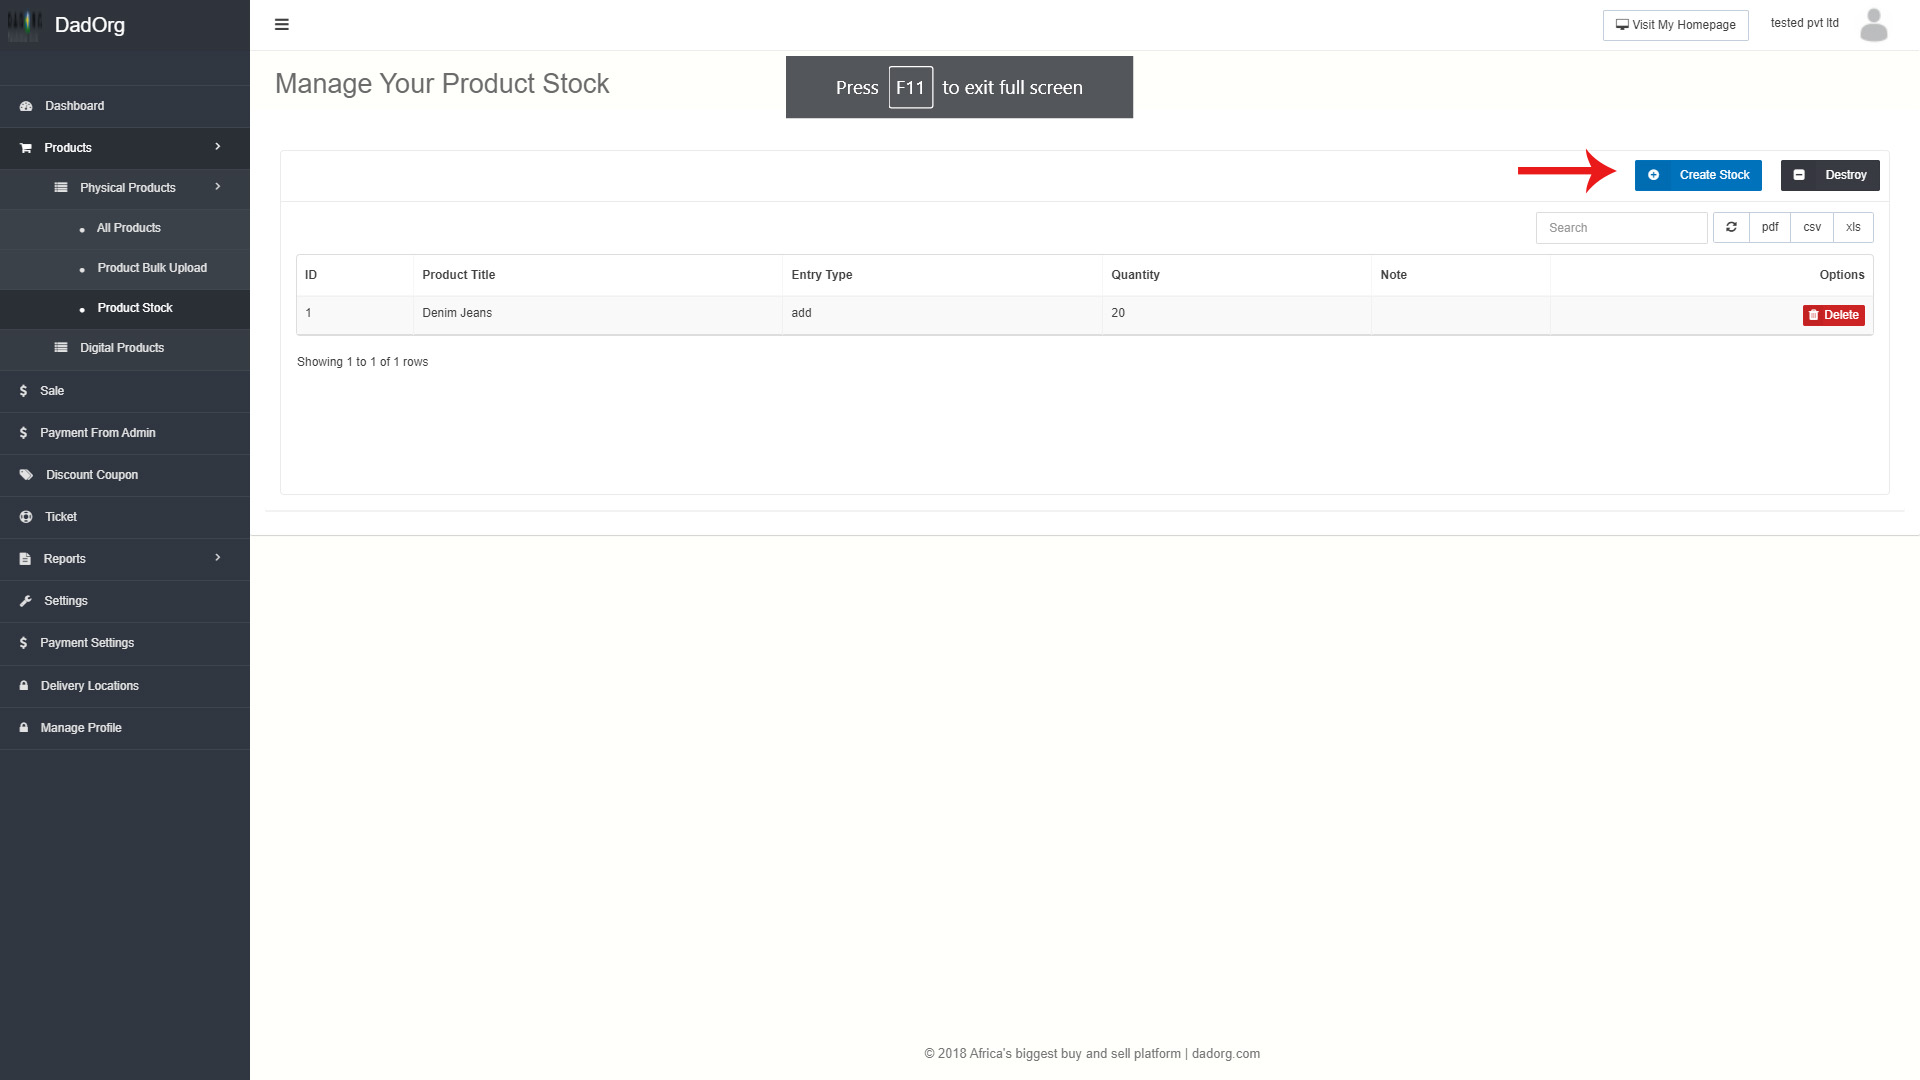
C) Product Stock: Here you can see all stock of products and also add stock to products.
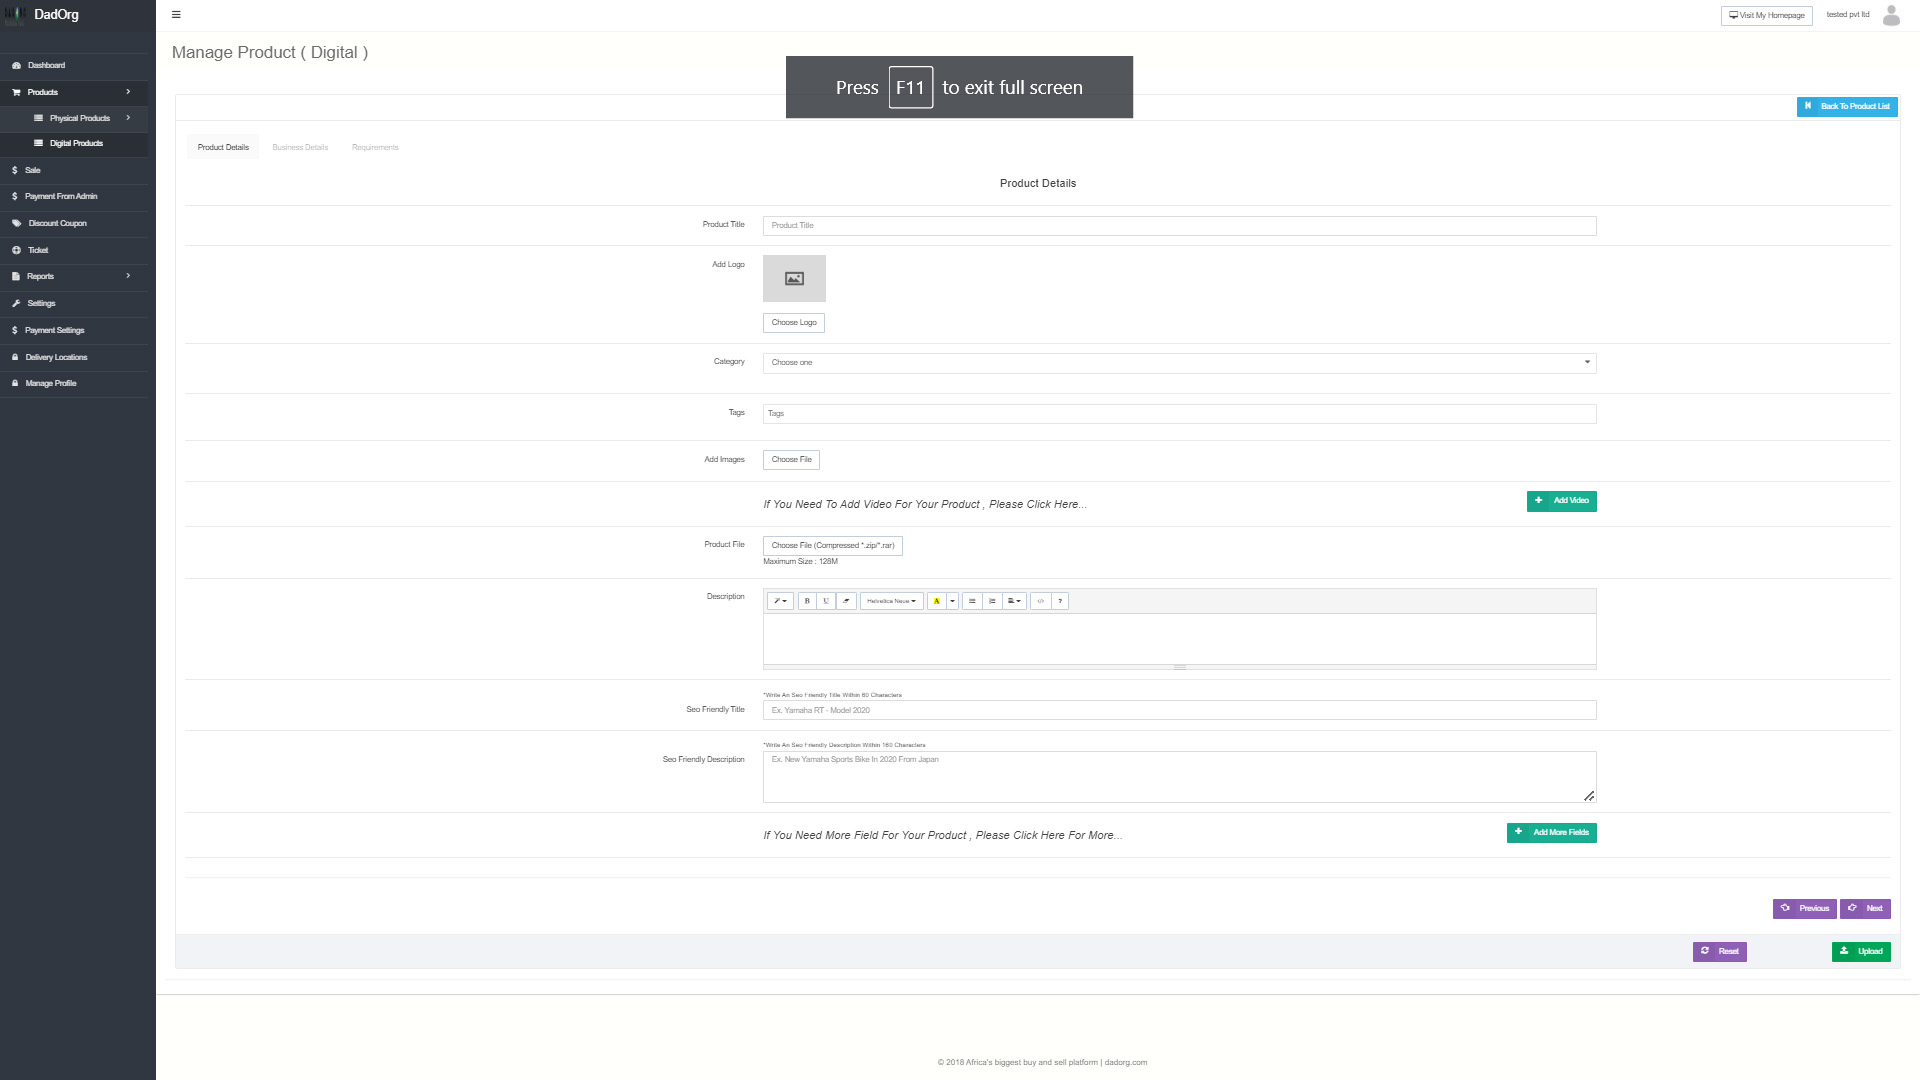
D) Digital Products: You can also add digital products like books, movie DVD, Music DVD etc But for it you need to upload “Compressed zip” file. All other fields will be added as same we added for simple products.
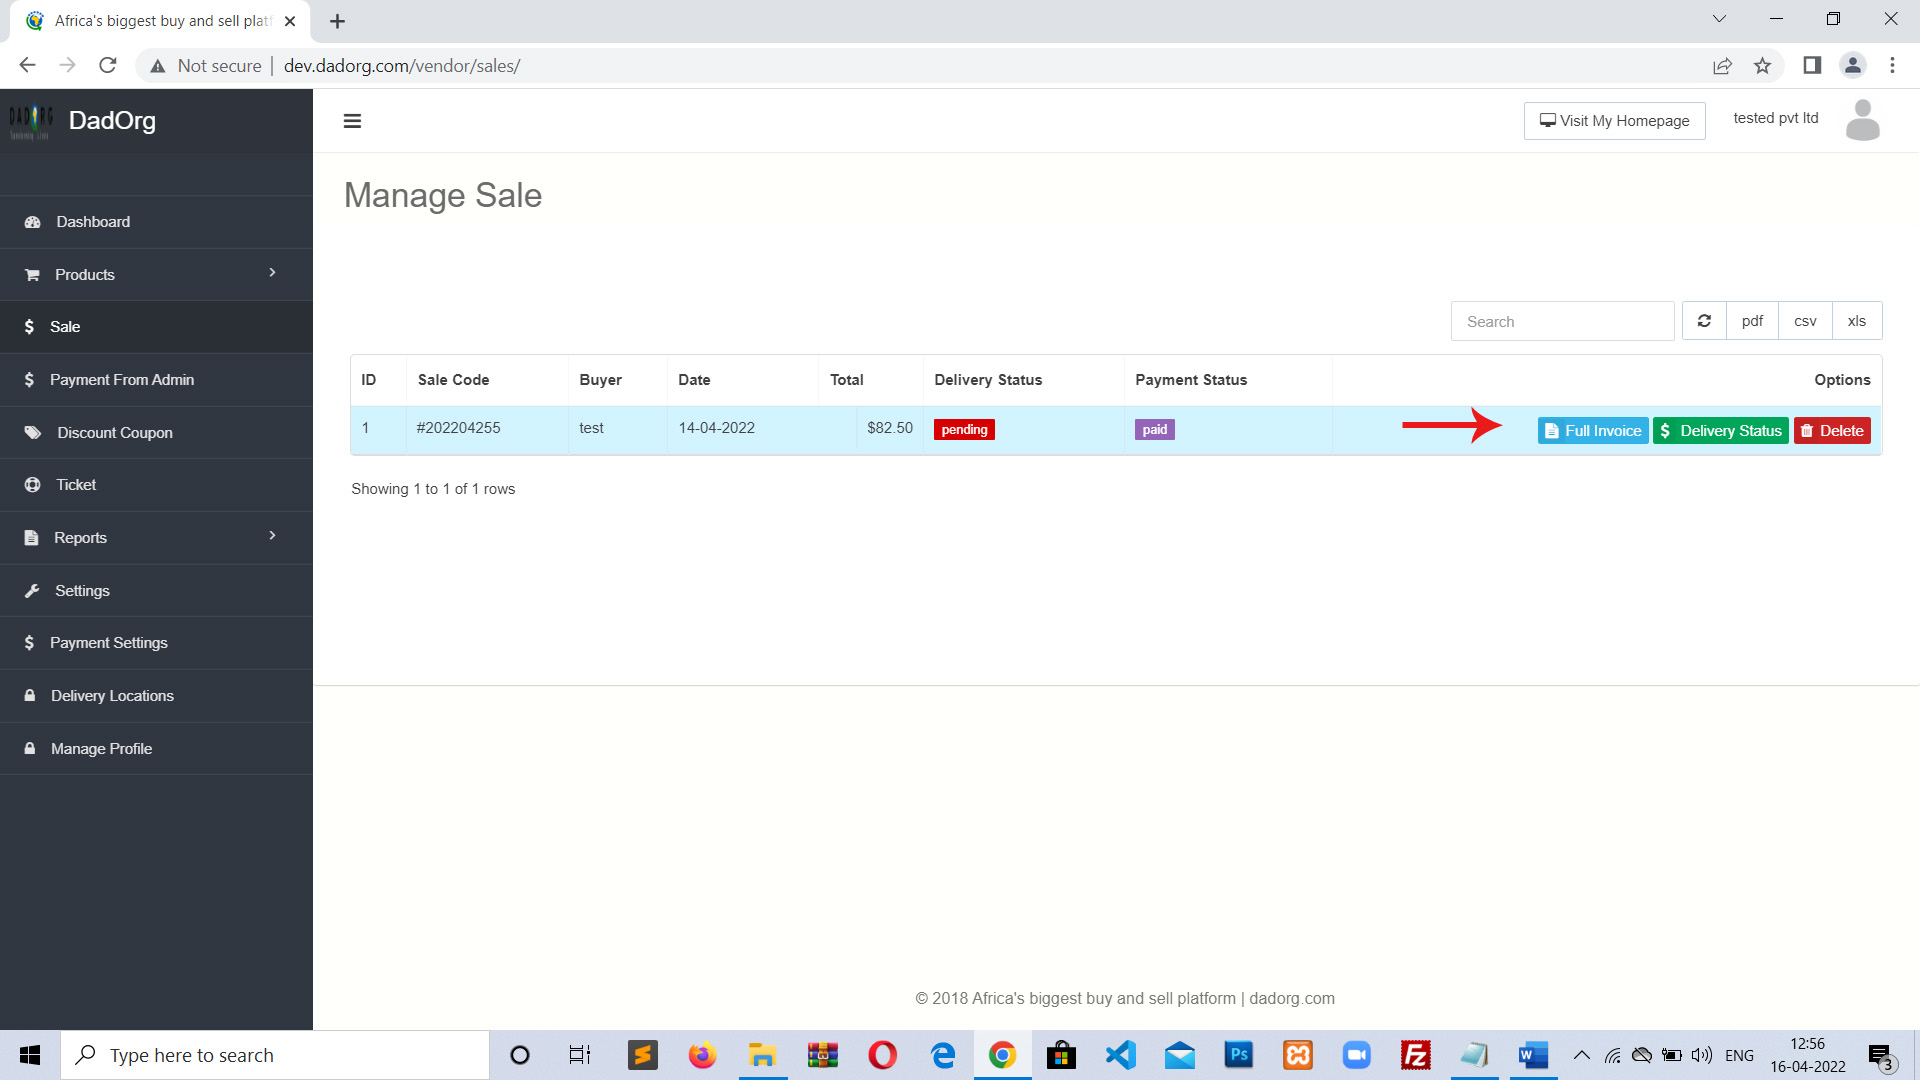
3. Sale: All your sell orders will be listed here. It will show detail of sell like price, buyer, payment status etc. In right there are option to view full Invoice, you can also print invoice there. There is also an option “Delivery Option” by this you can update delivery status according to product delivery information by your team/service. Click on “Delivery Status” button.
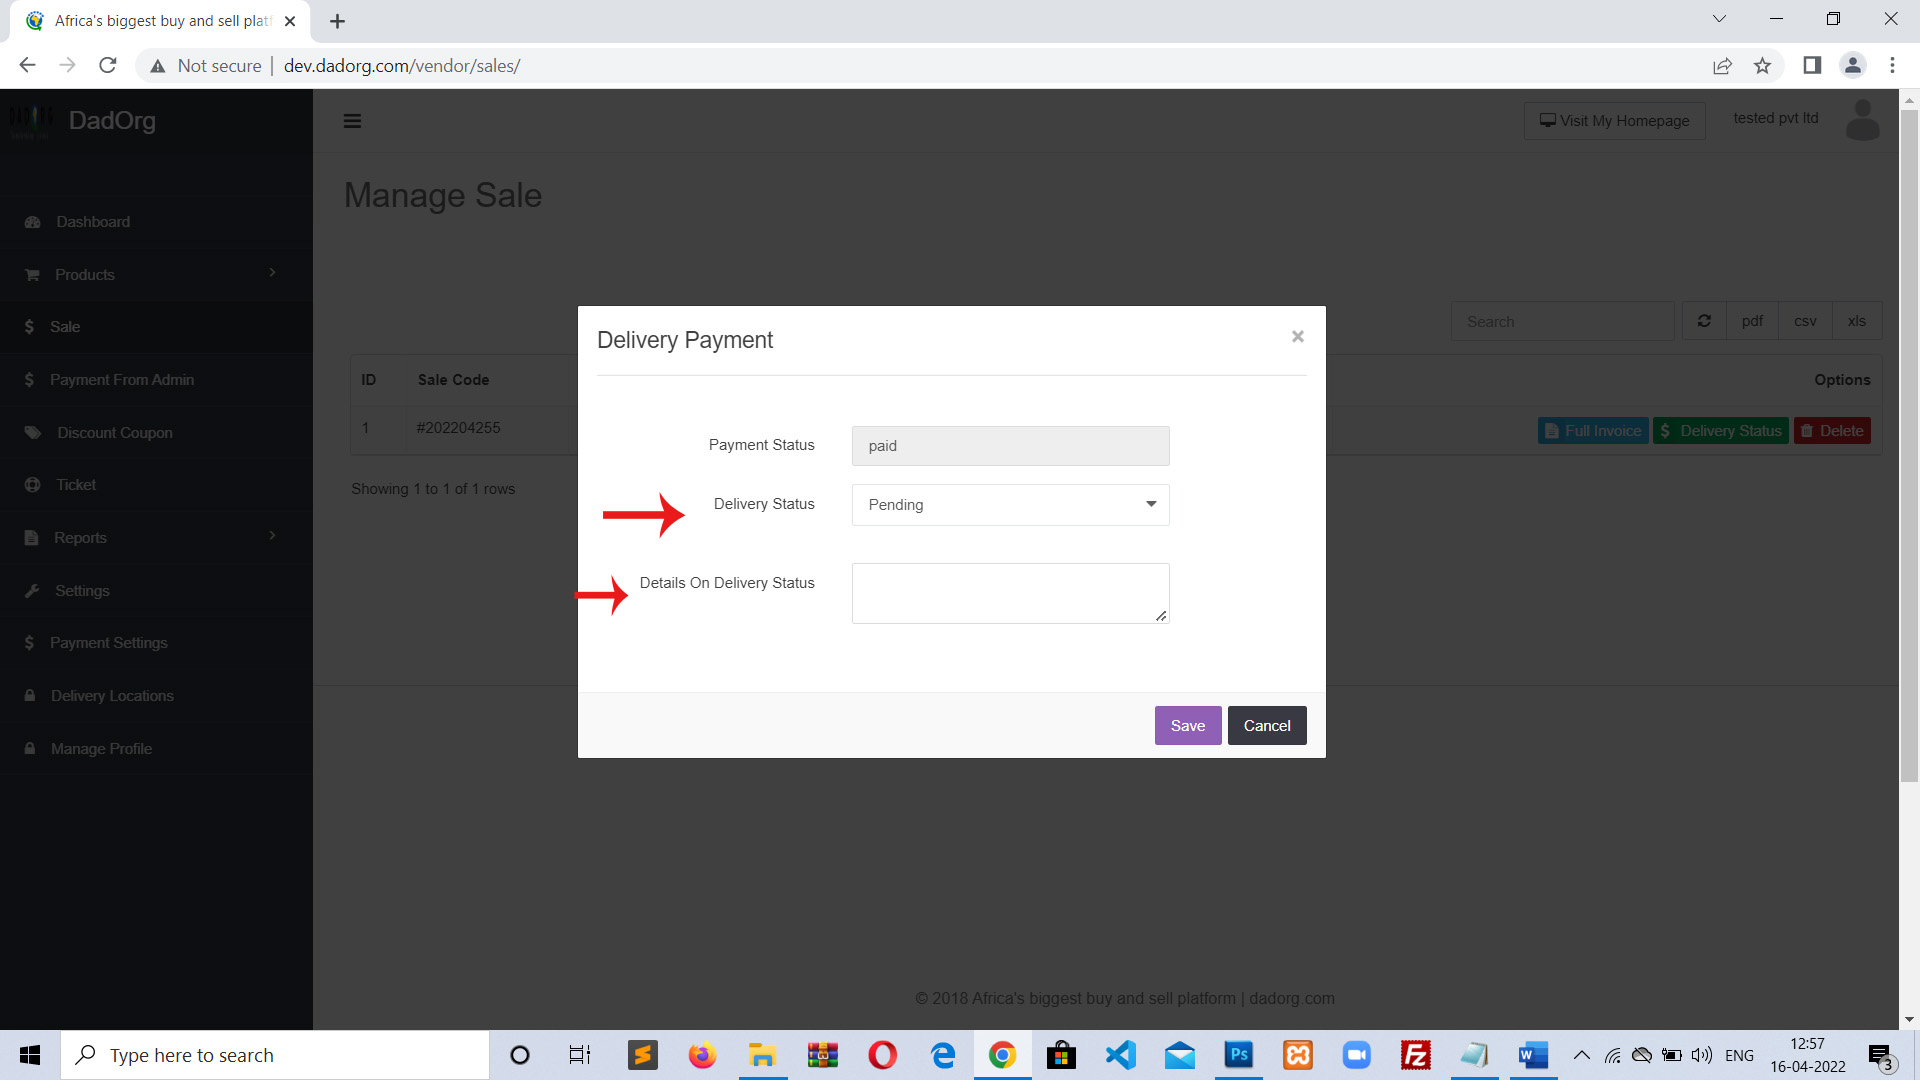
Next screen to change delivery status will look like this. Select the delivery status from dropdown. Then fill details of delivery status like below some example for details of delivery:
>> Product is under packing process.
>> Product dispatched and will reach in 2-3 days (an expected time)
>> Product in on delivery.
>> Product is delivered on date.
There may be more you can fill any detail for delivery status.
If product is delivered to customer, then confirm and select status as “Delivered”. After filling status click on save button.
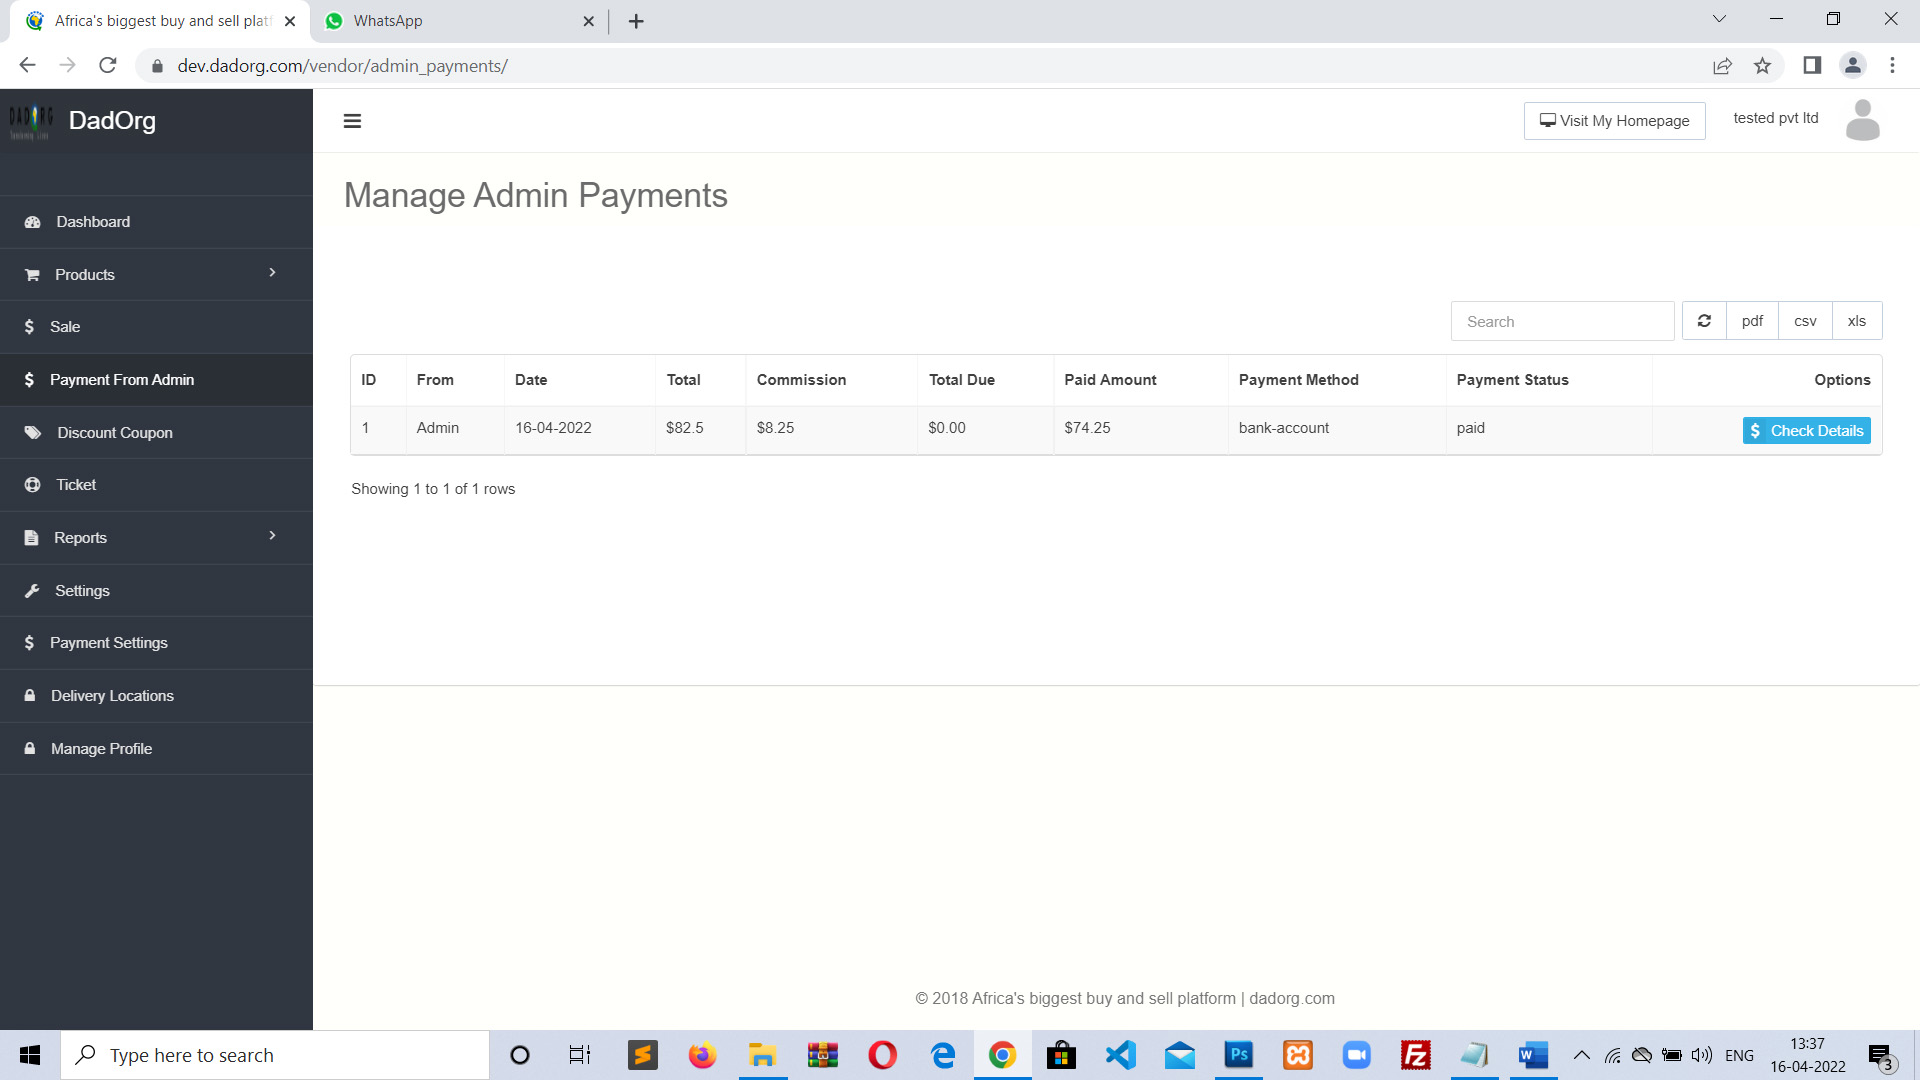
4. Payment From Admin: When admin will to you then all payments made by admin will be listed here.
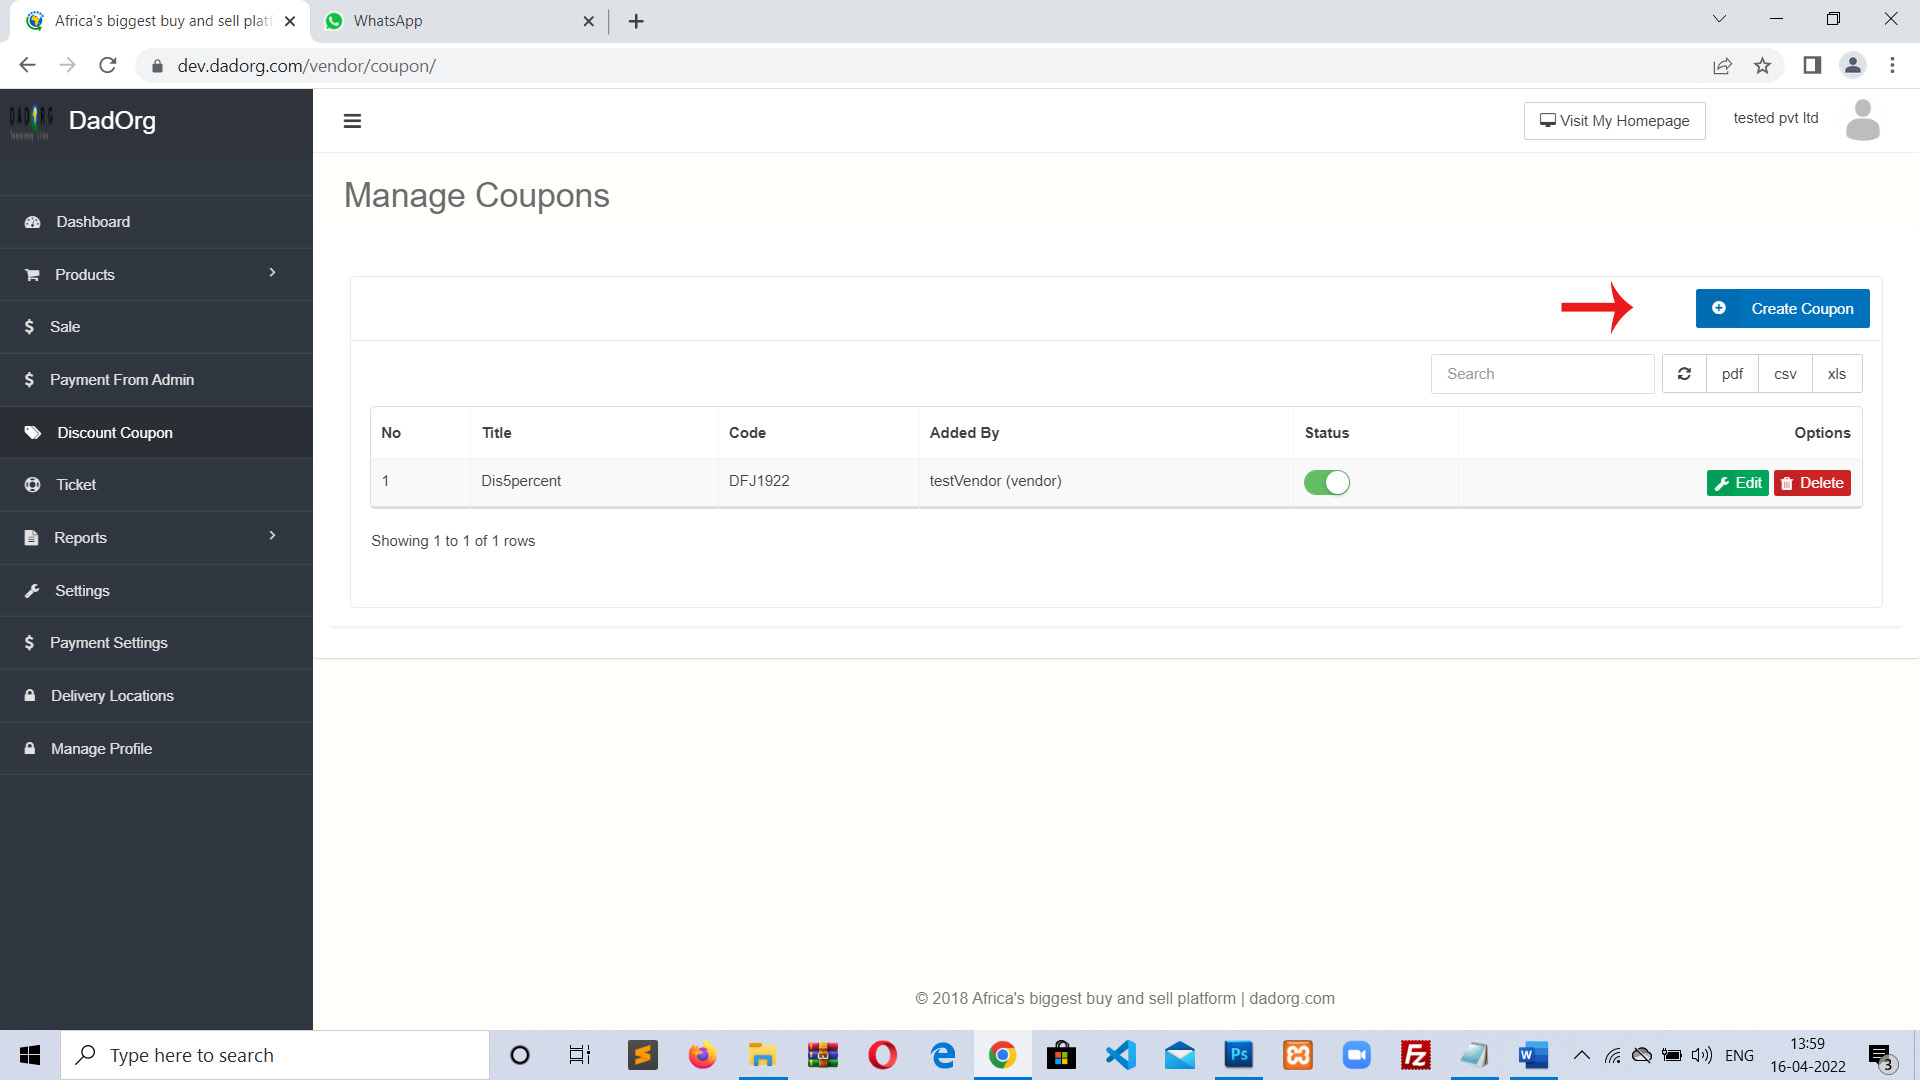
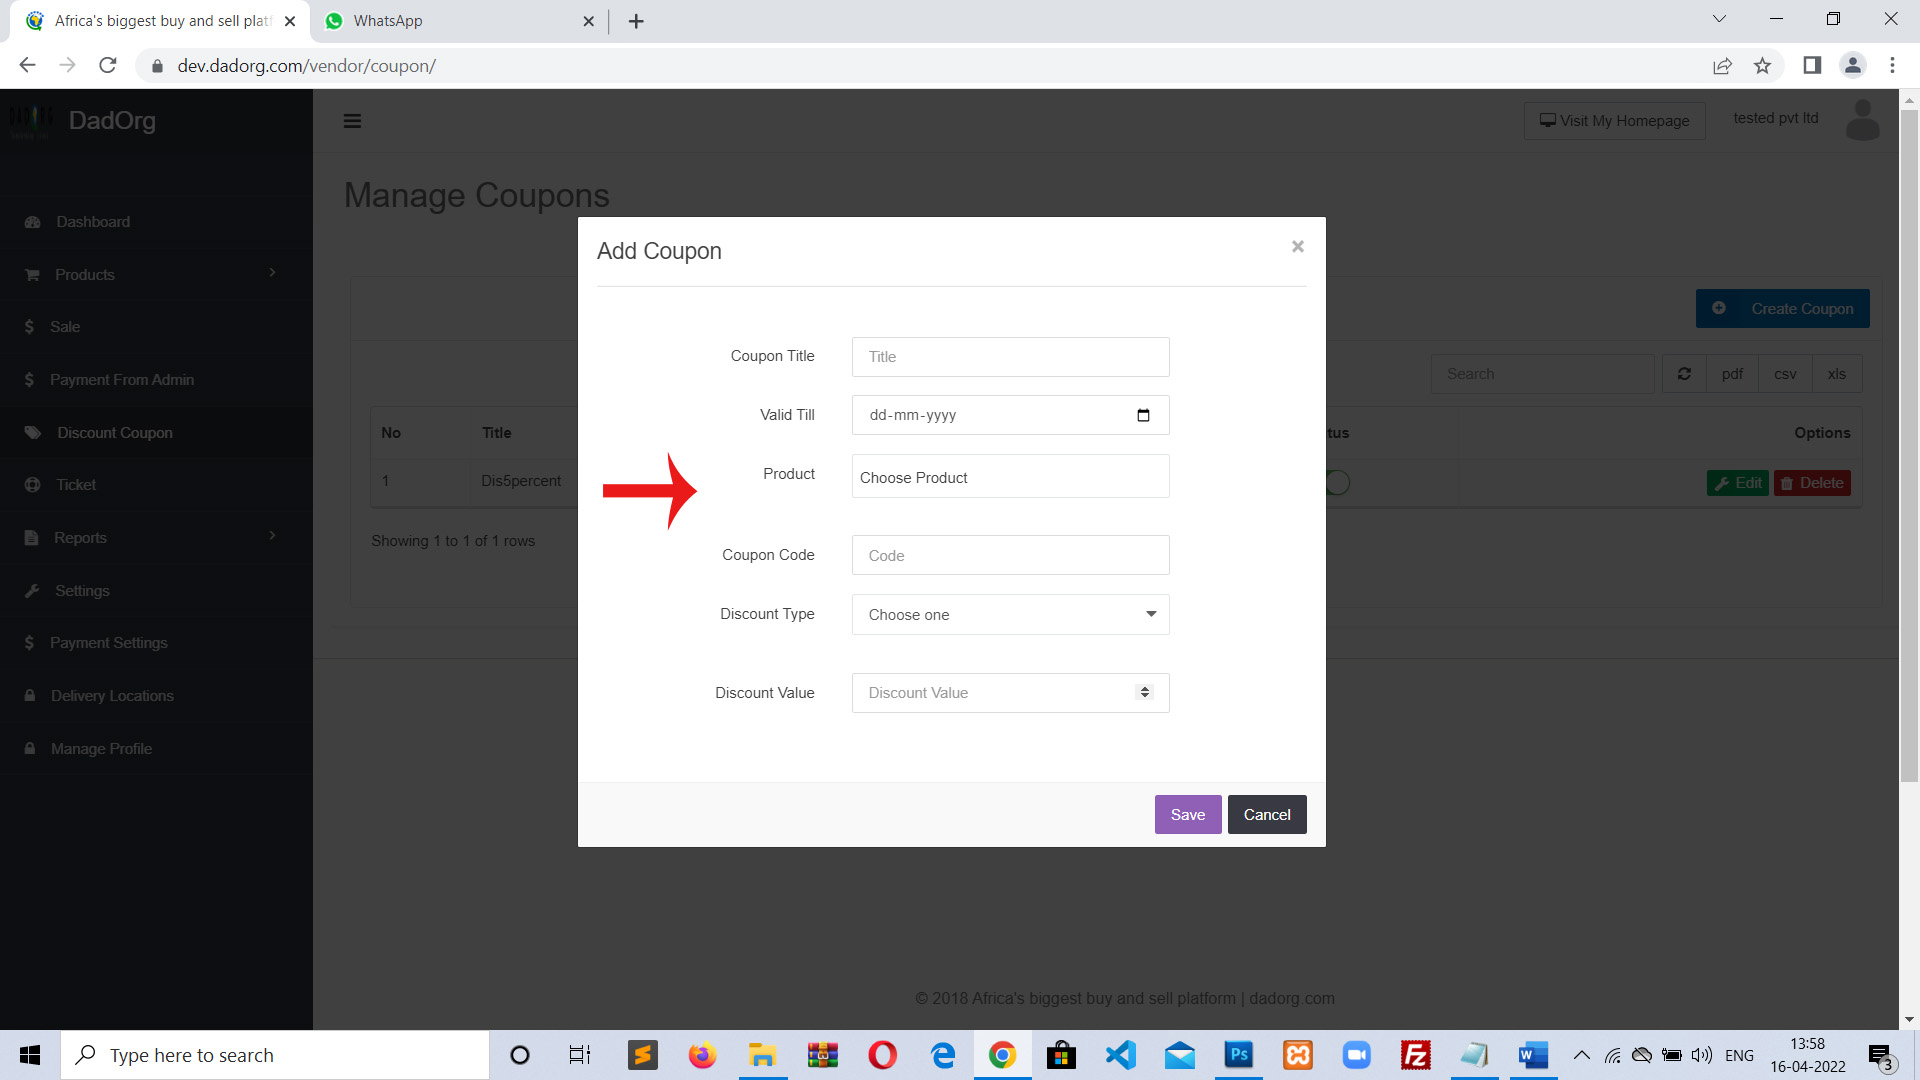
5. Discount Coupon: All created coupon will be listed here. There is also an option to create coupon in right side.
When you click on create coupon the following screen will come. Here fill all details for coupon like name, valid date, coupon code (any code including letters or numbers), product (on which you want to provide discount coupon), Discount type (% or fix value) and save it.
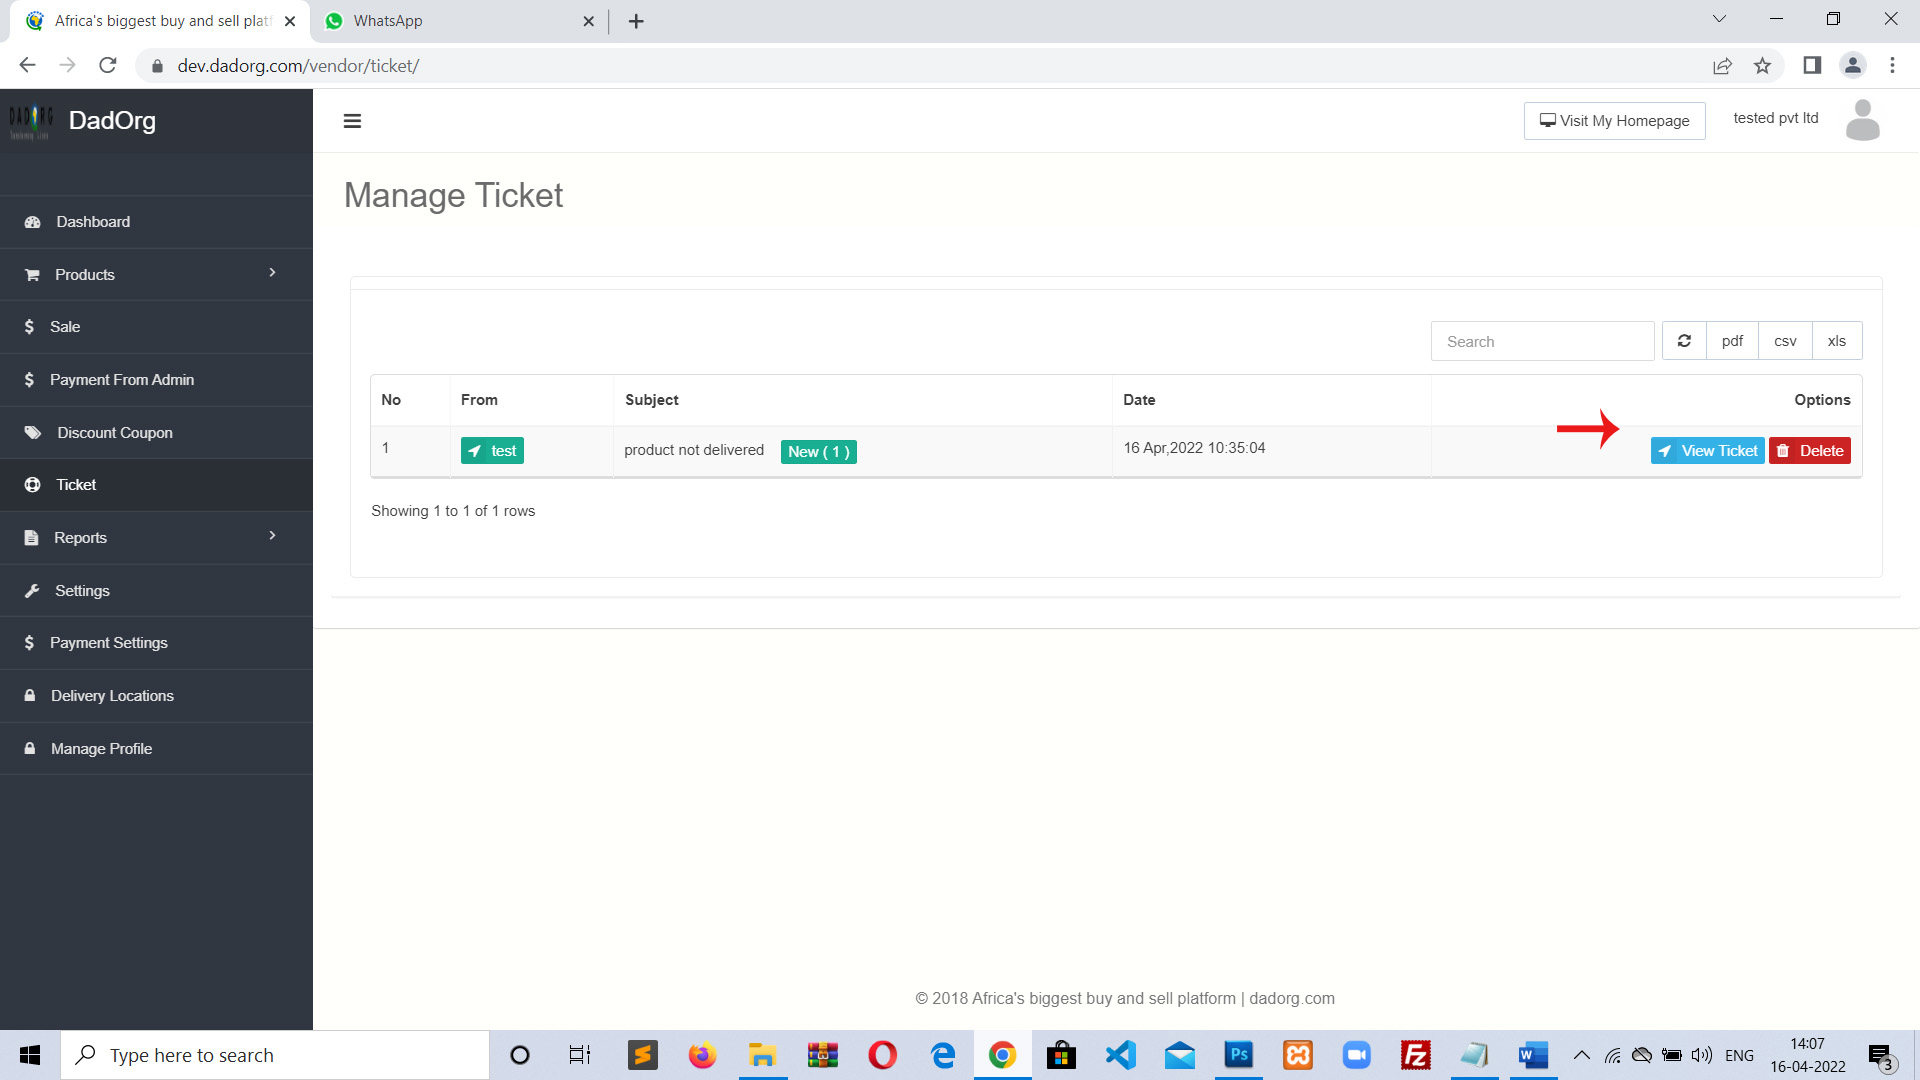
6. Ticket: When any customer will send any ticket message regarding his problem with product like not delivered, damage product etc. Then all ticket messages from customers will be listed here and you can view and reply messages from here.
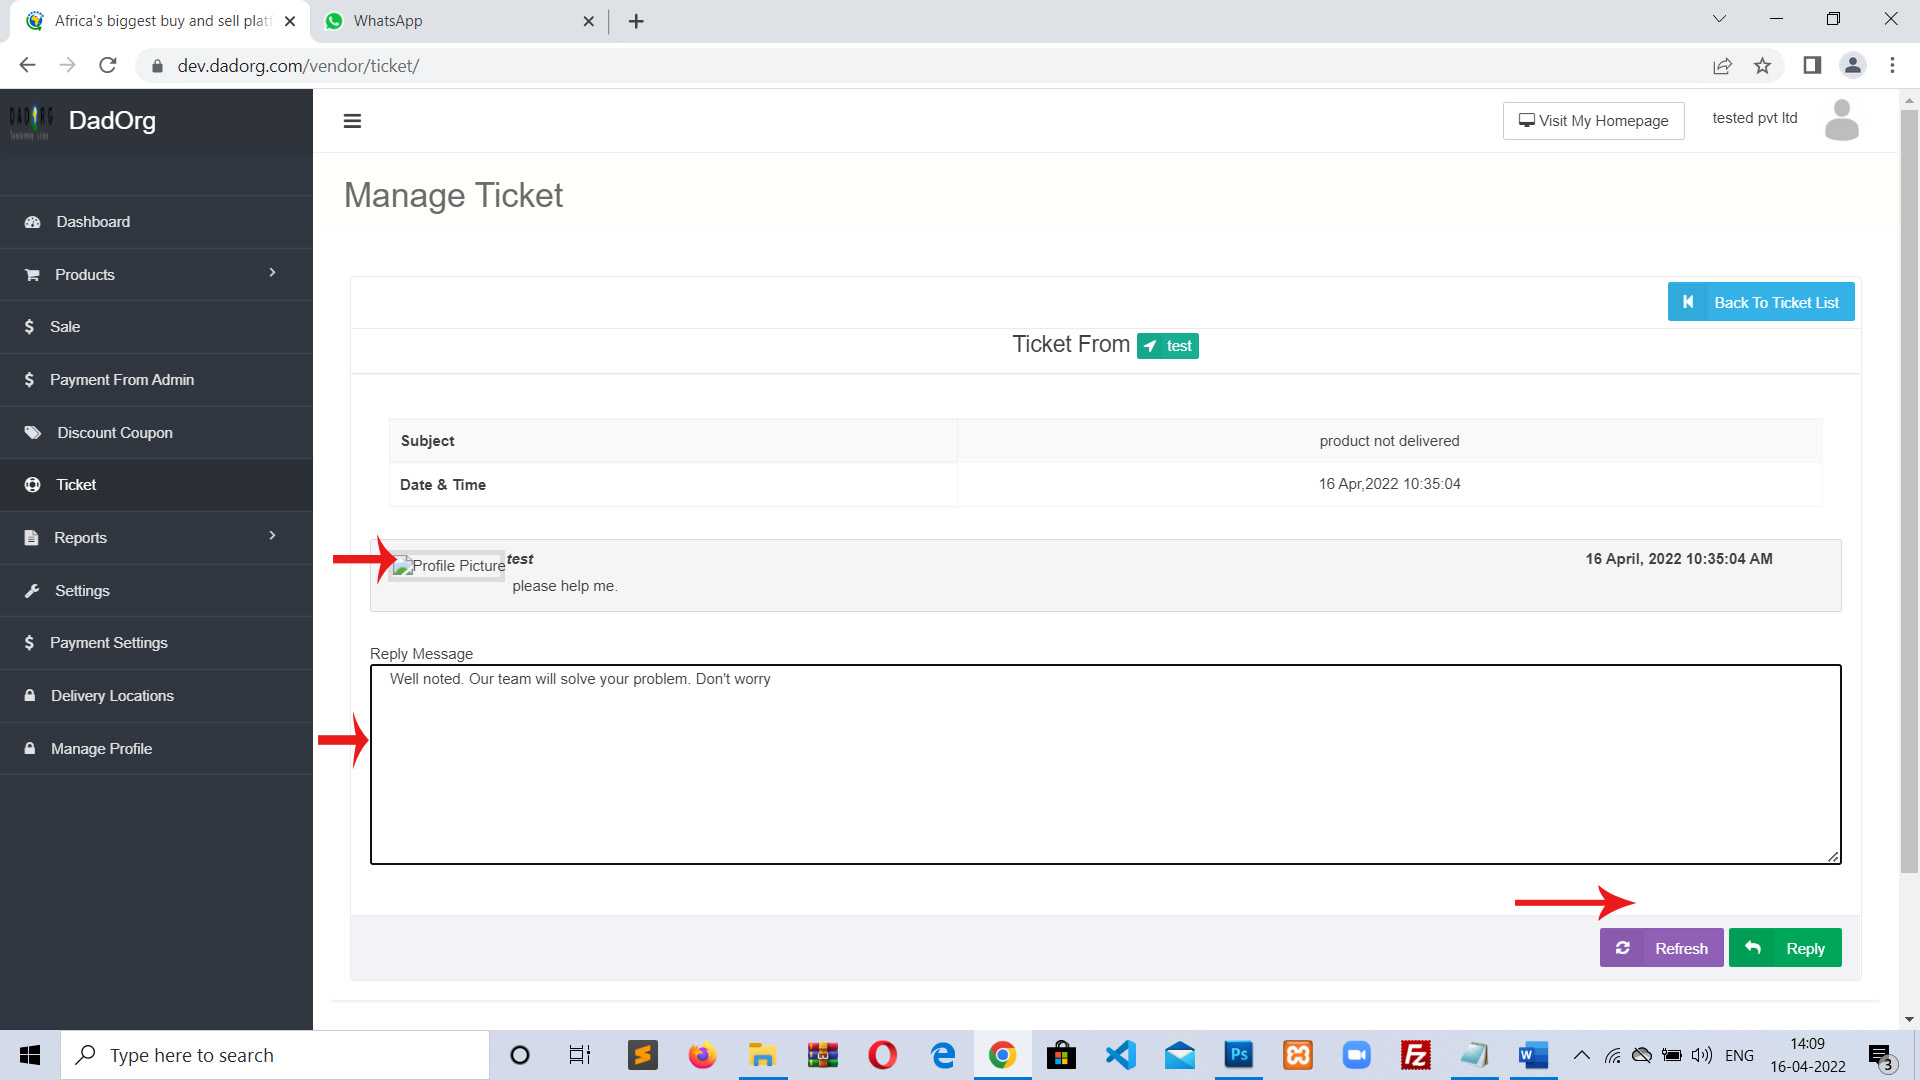
Click on “view ticket” to view and reply messages. Next screen will be like this. You see ticket message and reply it.
7. Reports:
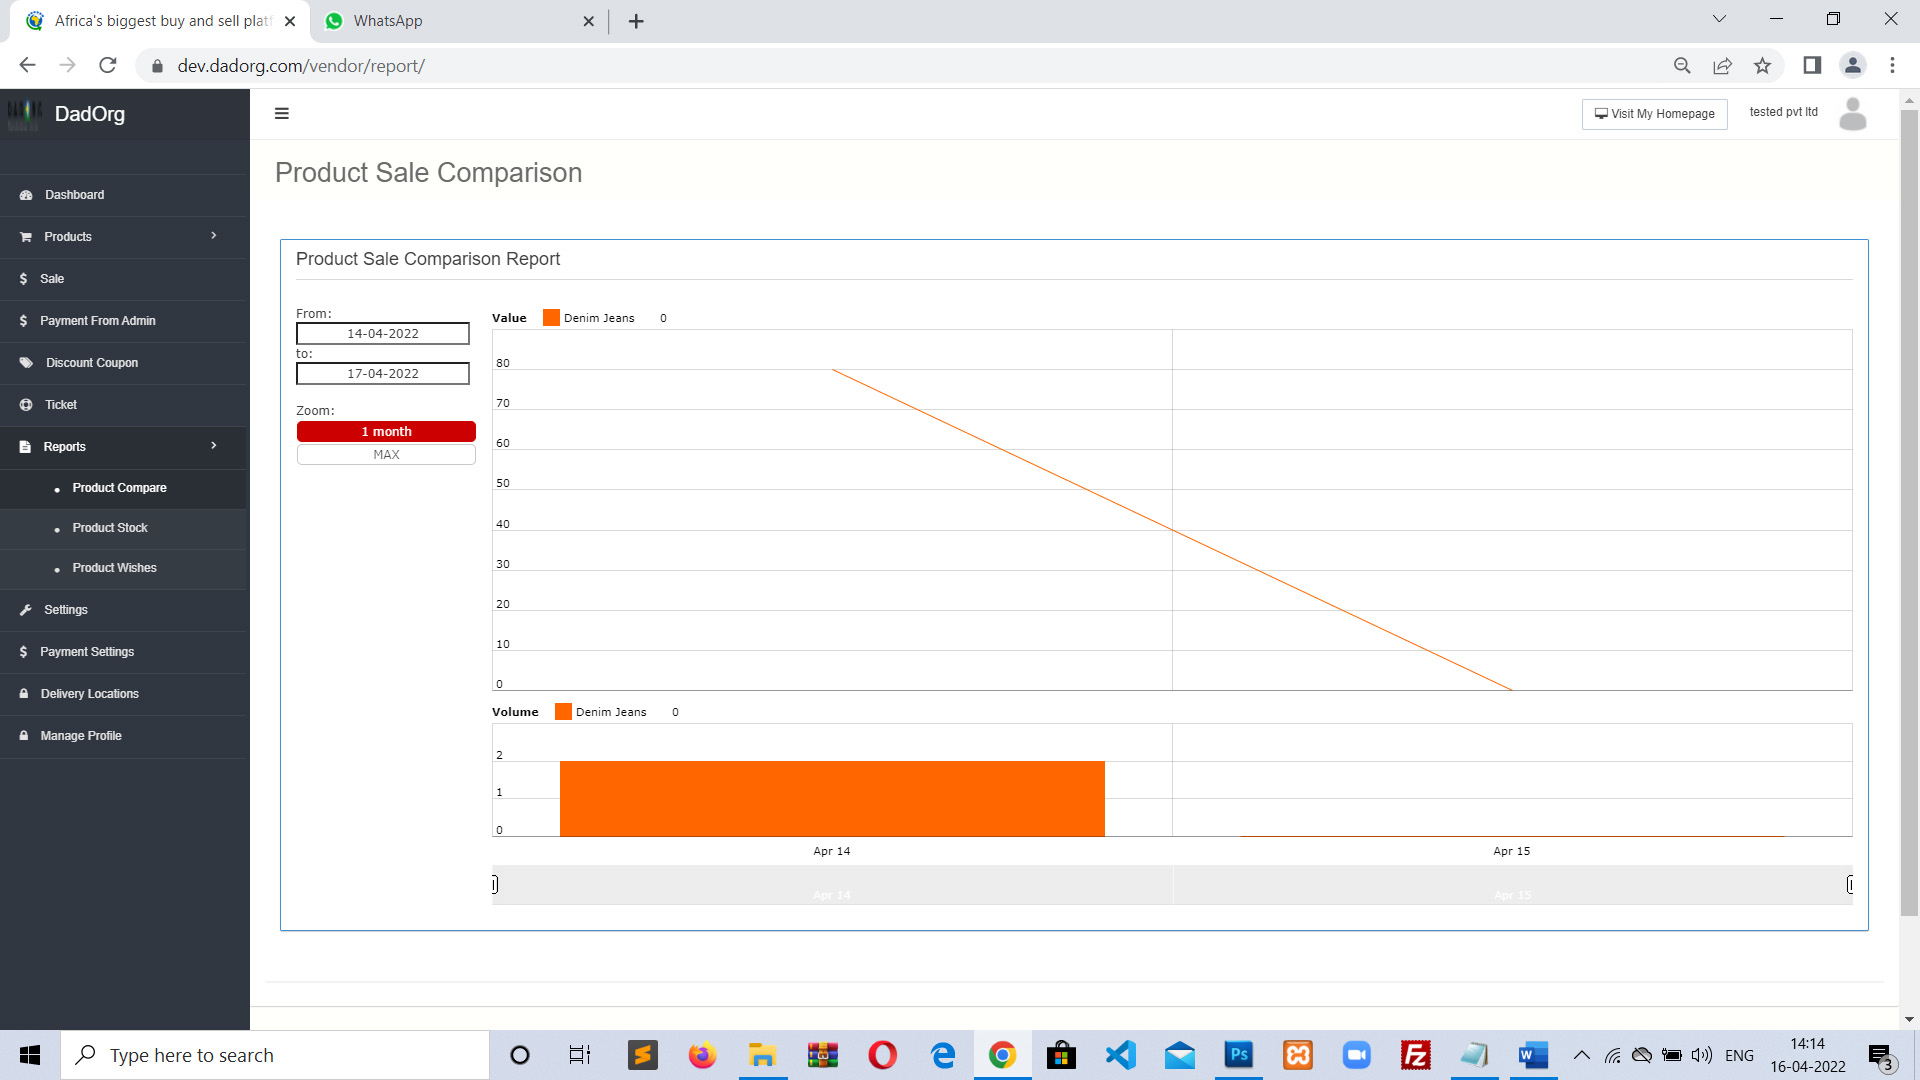
A) Product Compare: Here you can see compare report for your products.
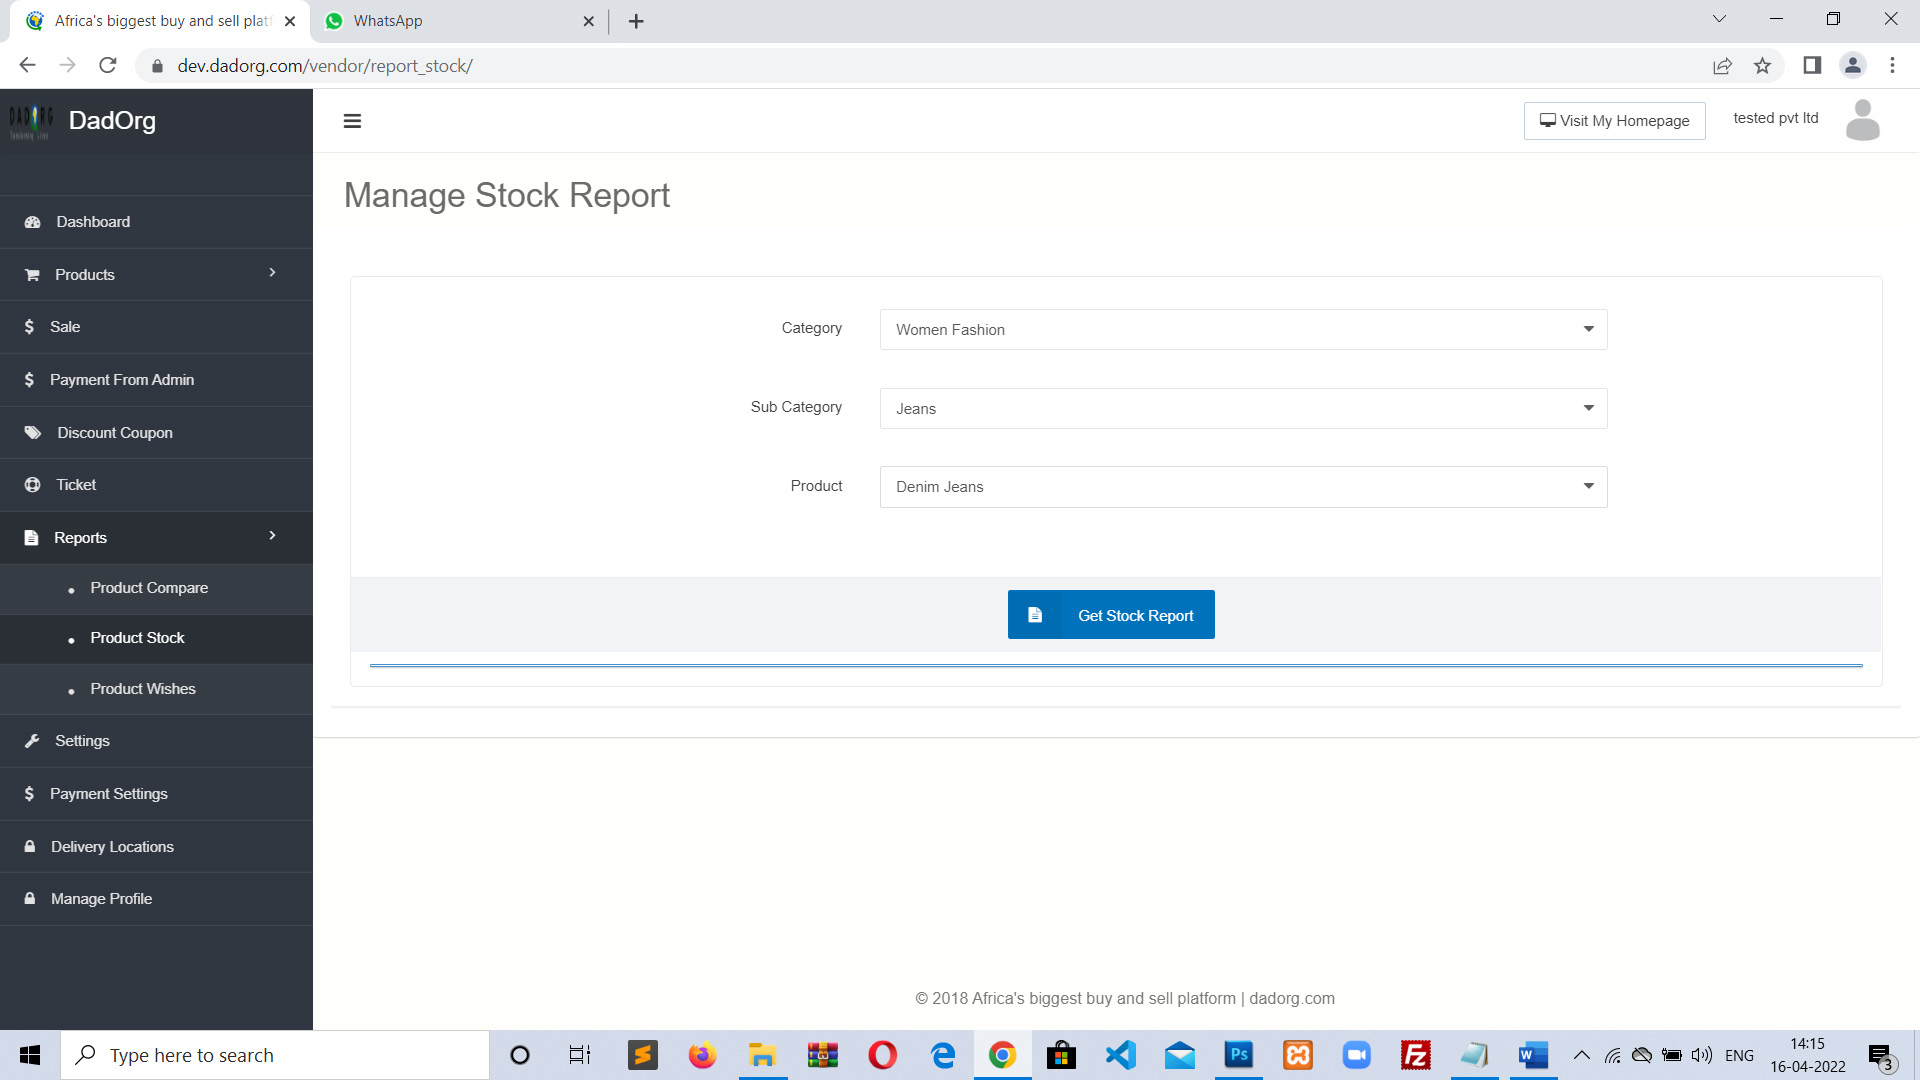
B) Product Stocks: Here you can see product stock report. To check stock report first you need to select category, sub category and then product. Then click on “Get Stock Report” button.
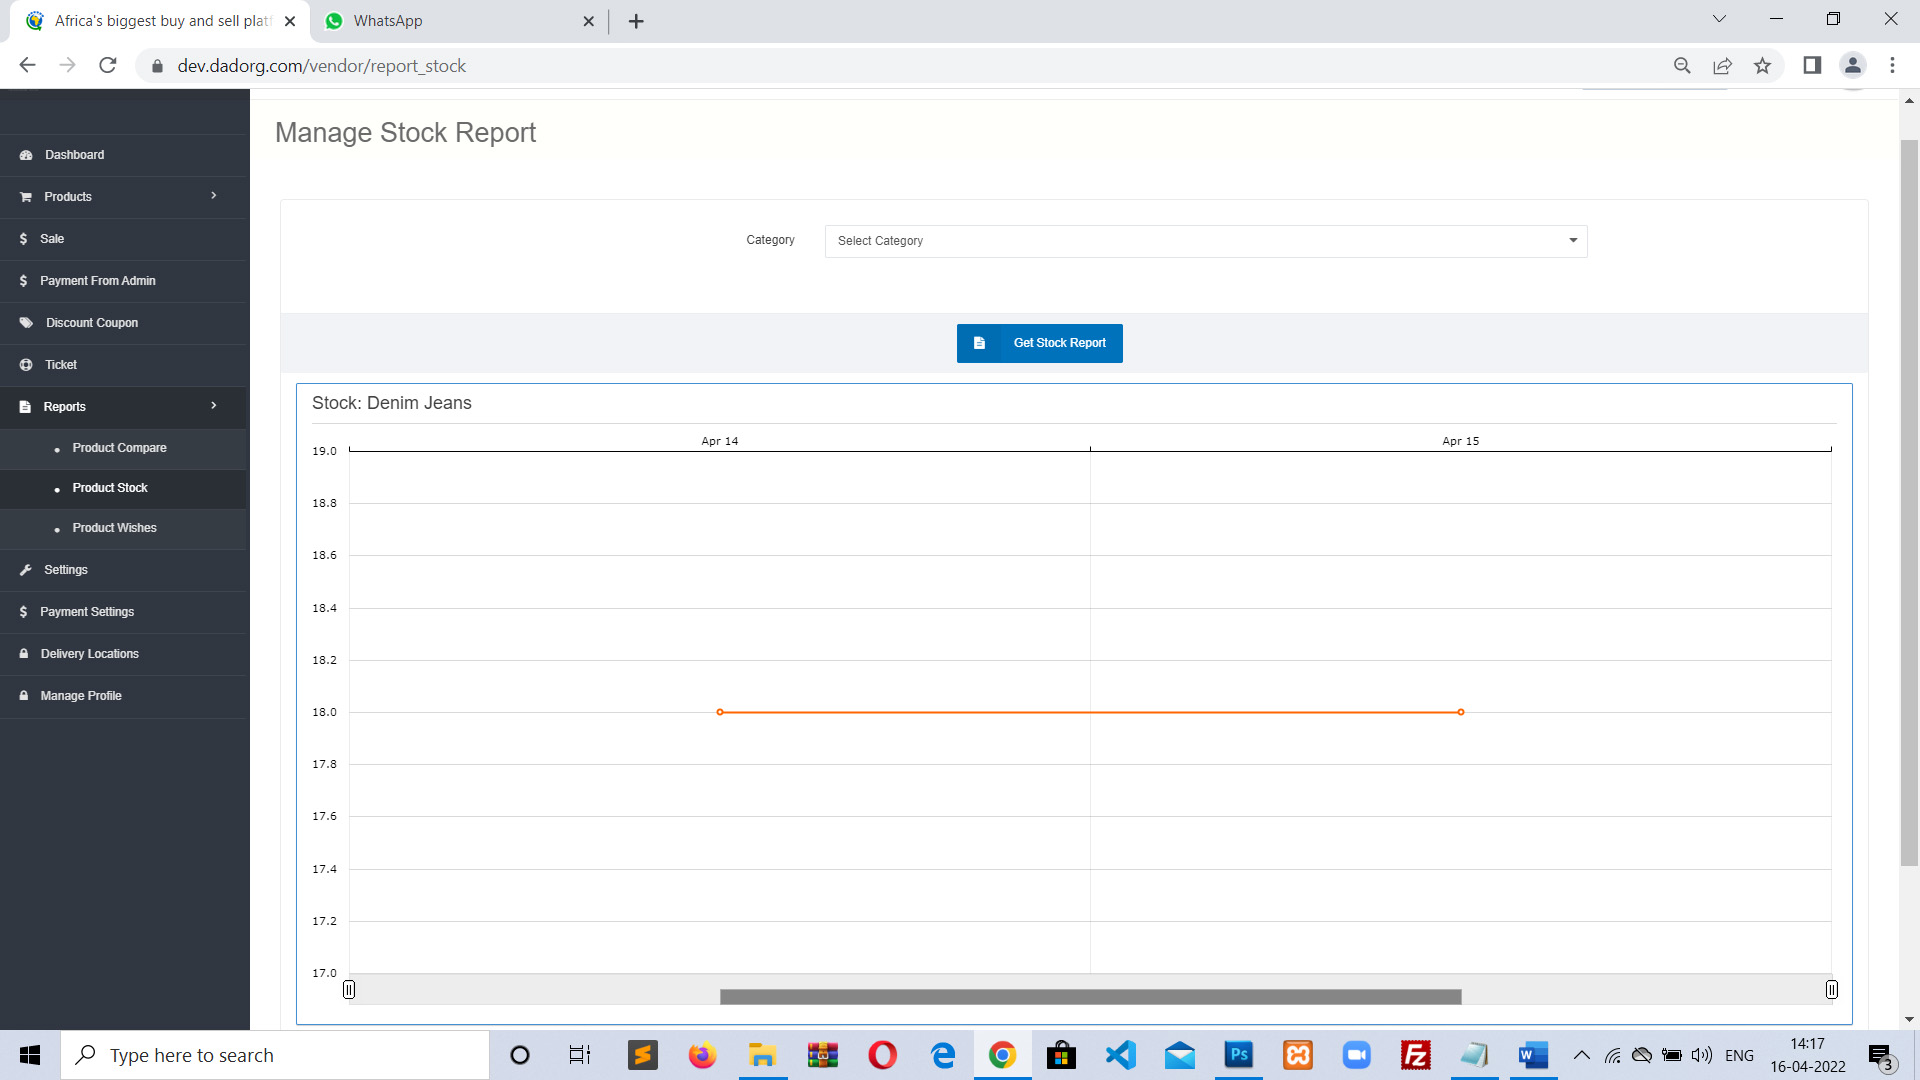
After clicking “Get Stock Report” button you see stock report.
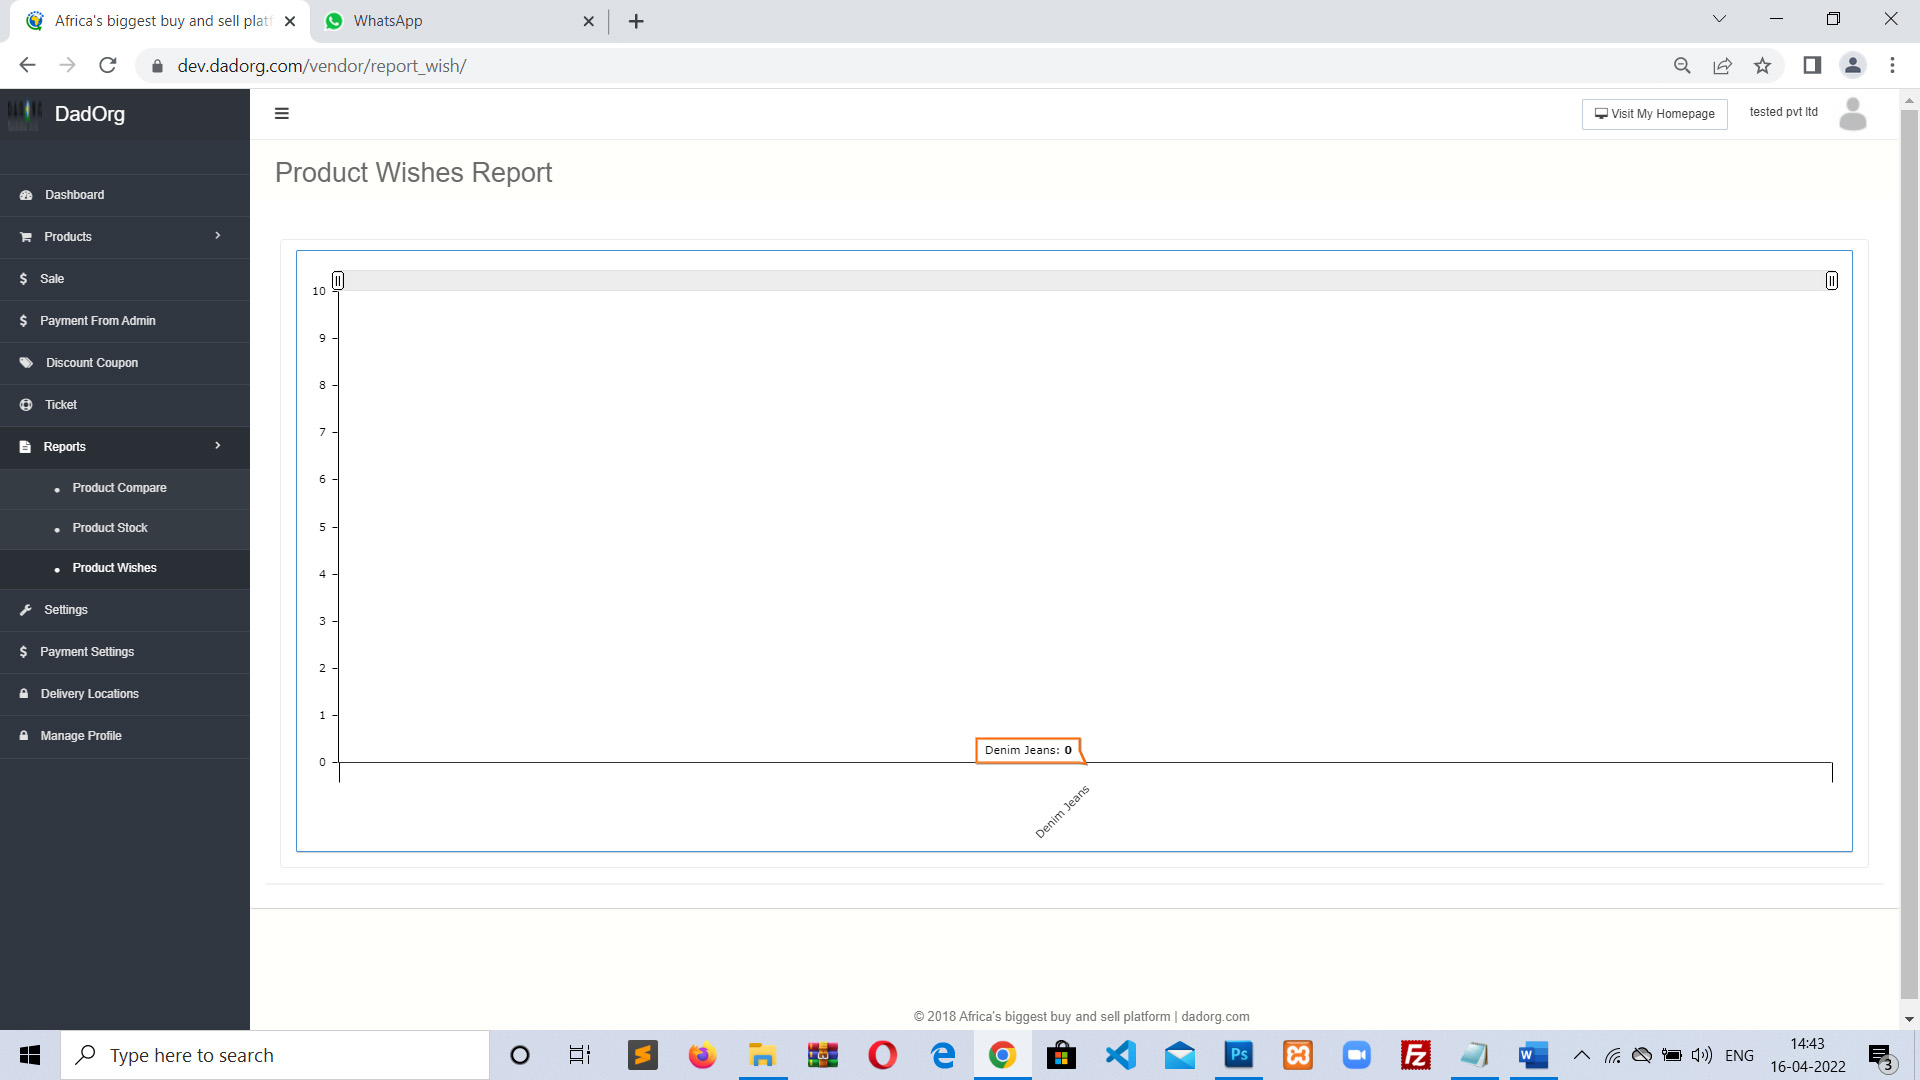
C) Products Wishes: Here you can see your product wish report means you can see which is more liked by customer and which one less.
8. Settings: Here you can upload the logo and business banner for your company profile page. Choose logo & banner image and click on save button.
Vendor Image-

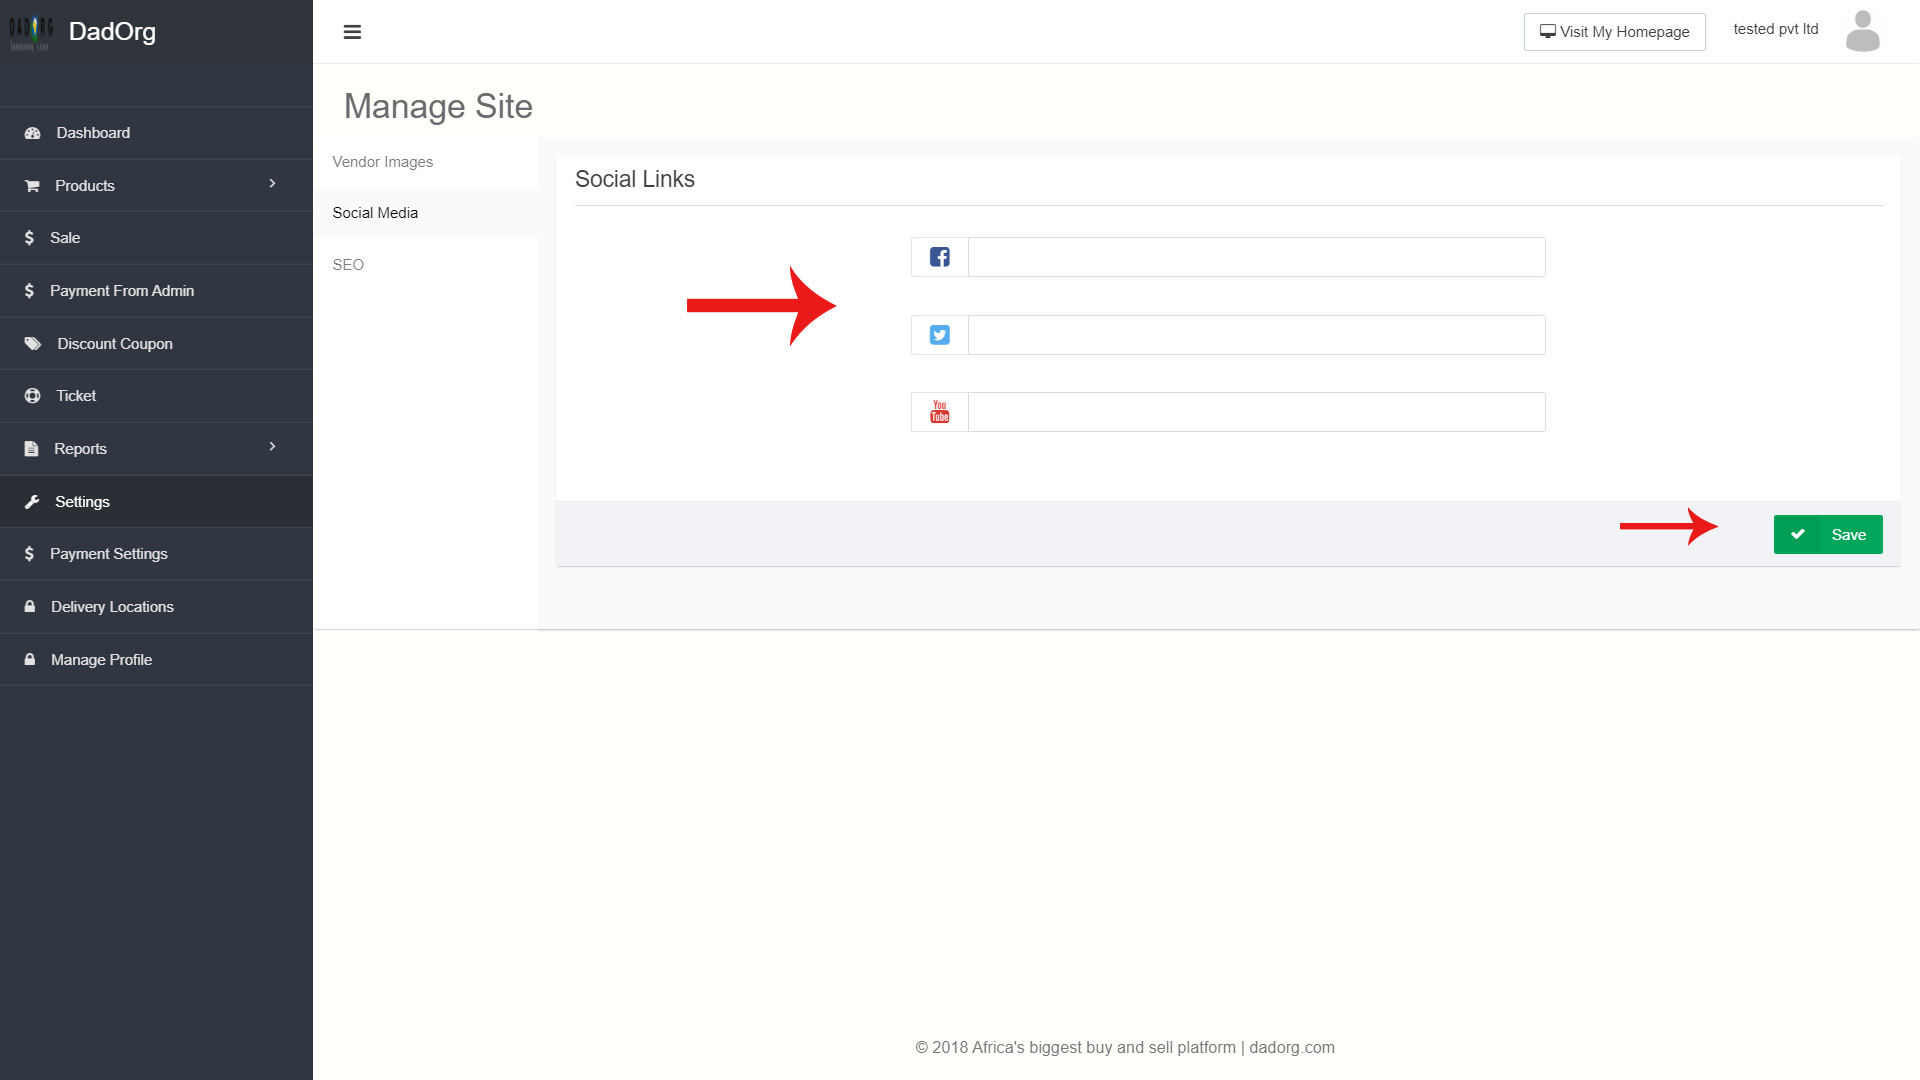
Social Media- Here you can add your social media page links for your company or your profile like facebook, twitter page link.
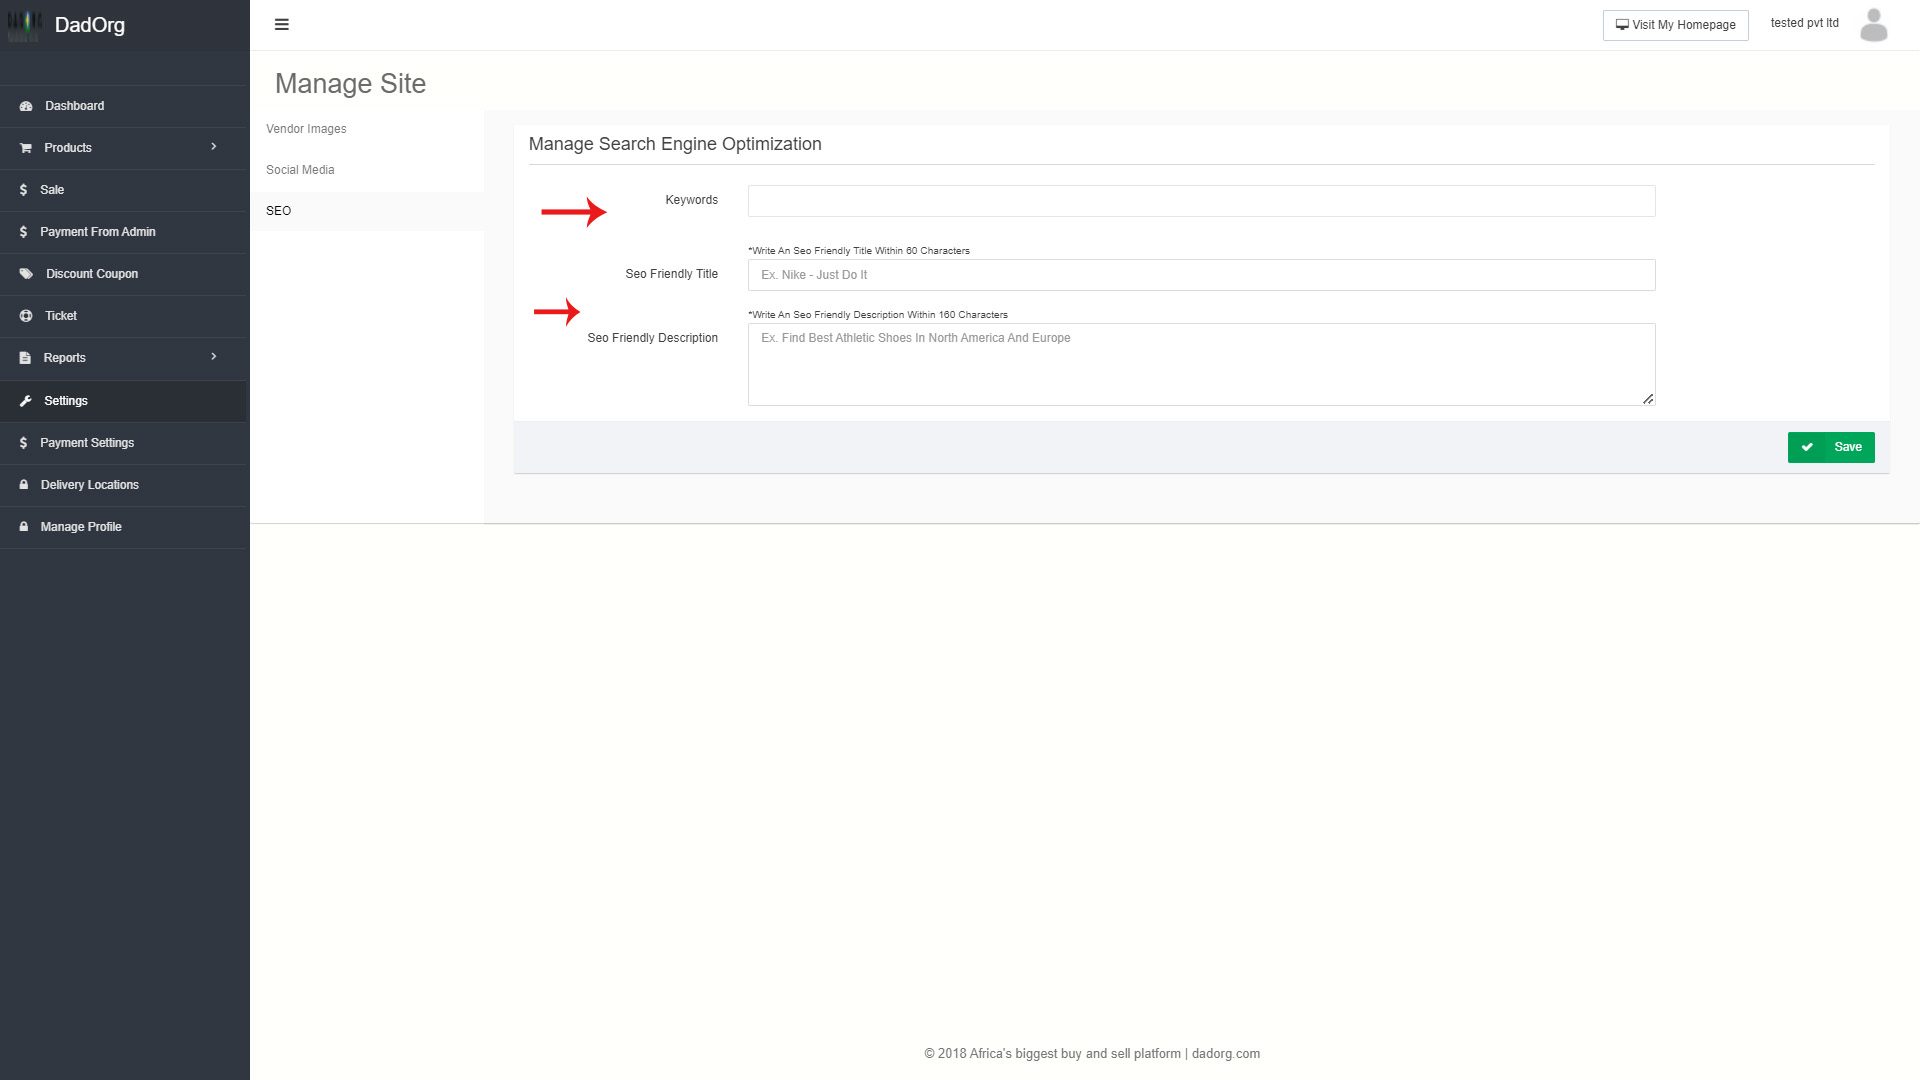
SEO- Here you can add SEO keywords, title & description to for your profile page and products. It will help customer to search your products on google and other search engines.
9. Delivery Locations: Delivery locations are necessary & required for each vendor. Each Vendor need to add at least 1 delivery location where he can deliver the products when ordered from dadorg. When you can click on “Delivery Locations” from left menu this screen will come:
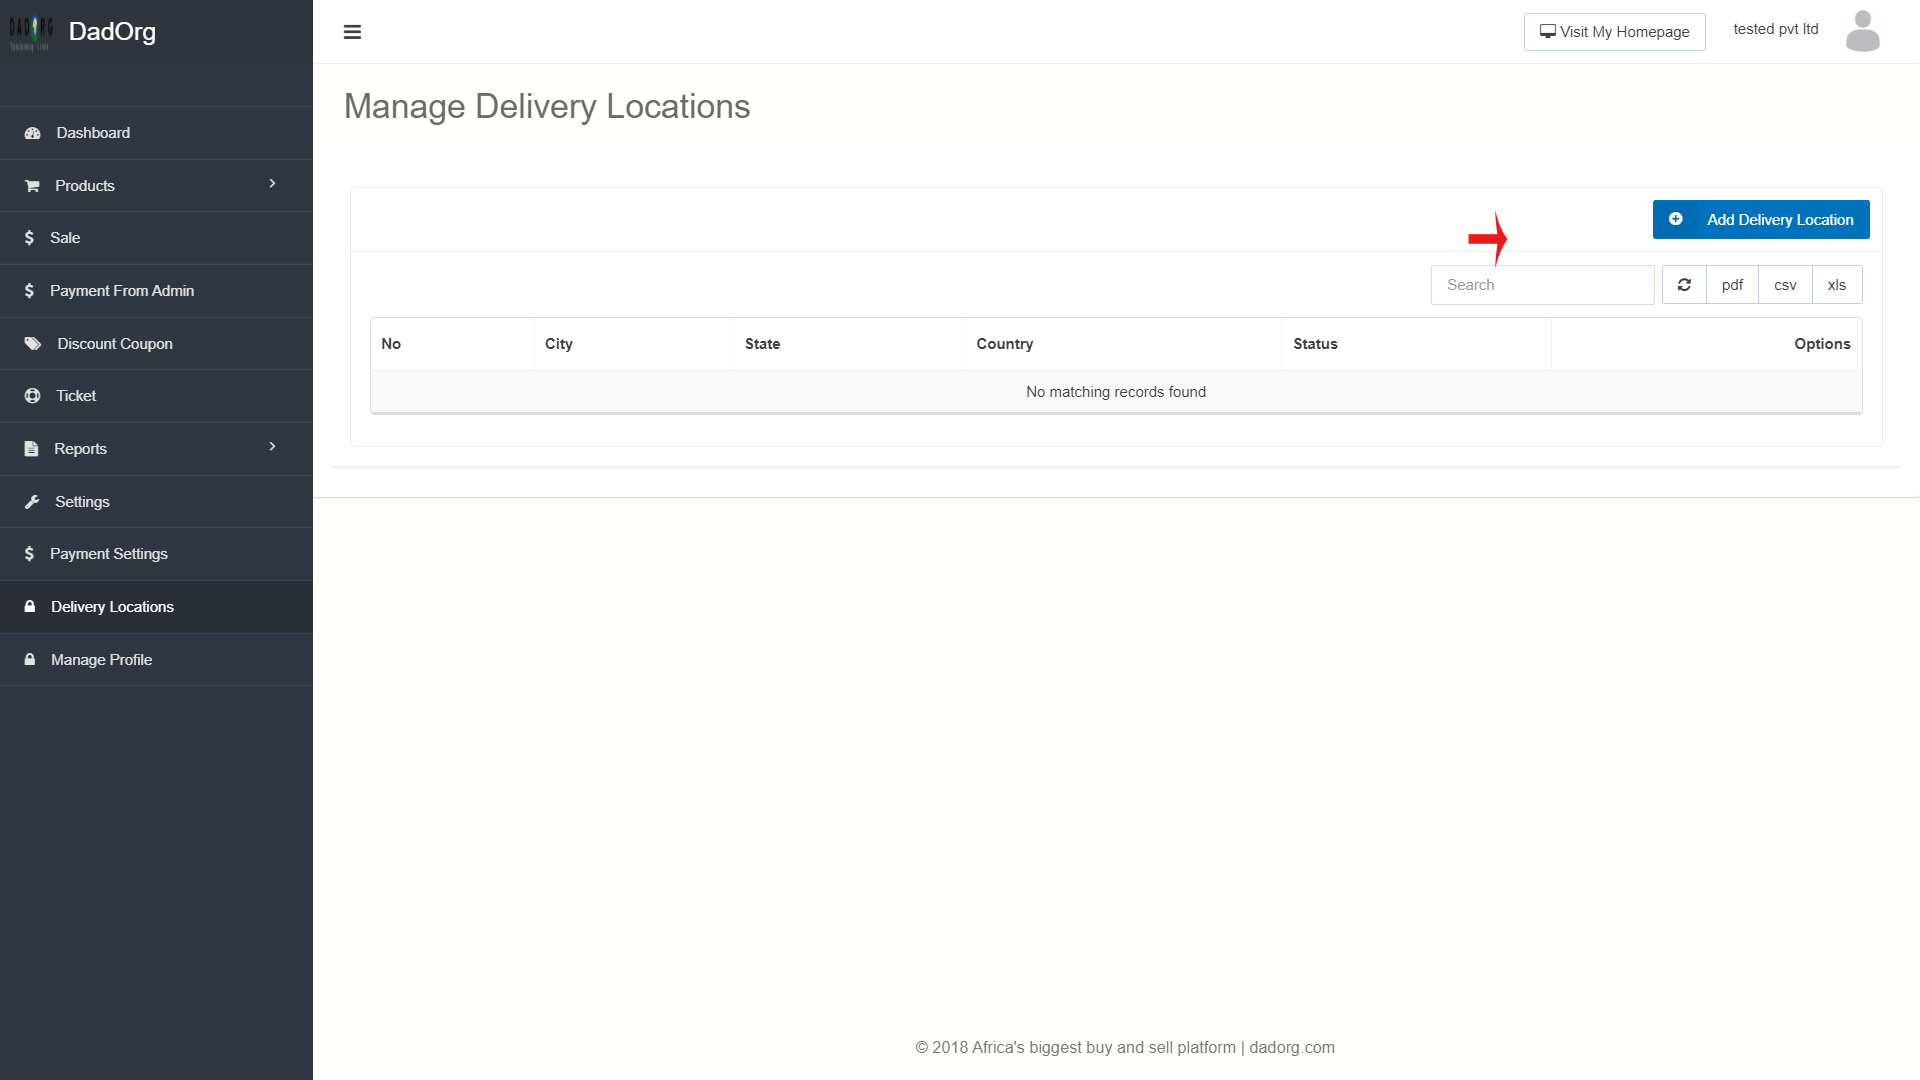
Now no delivery location is added till now. Click on “Add Delivery Location” button in right side.
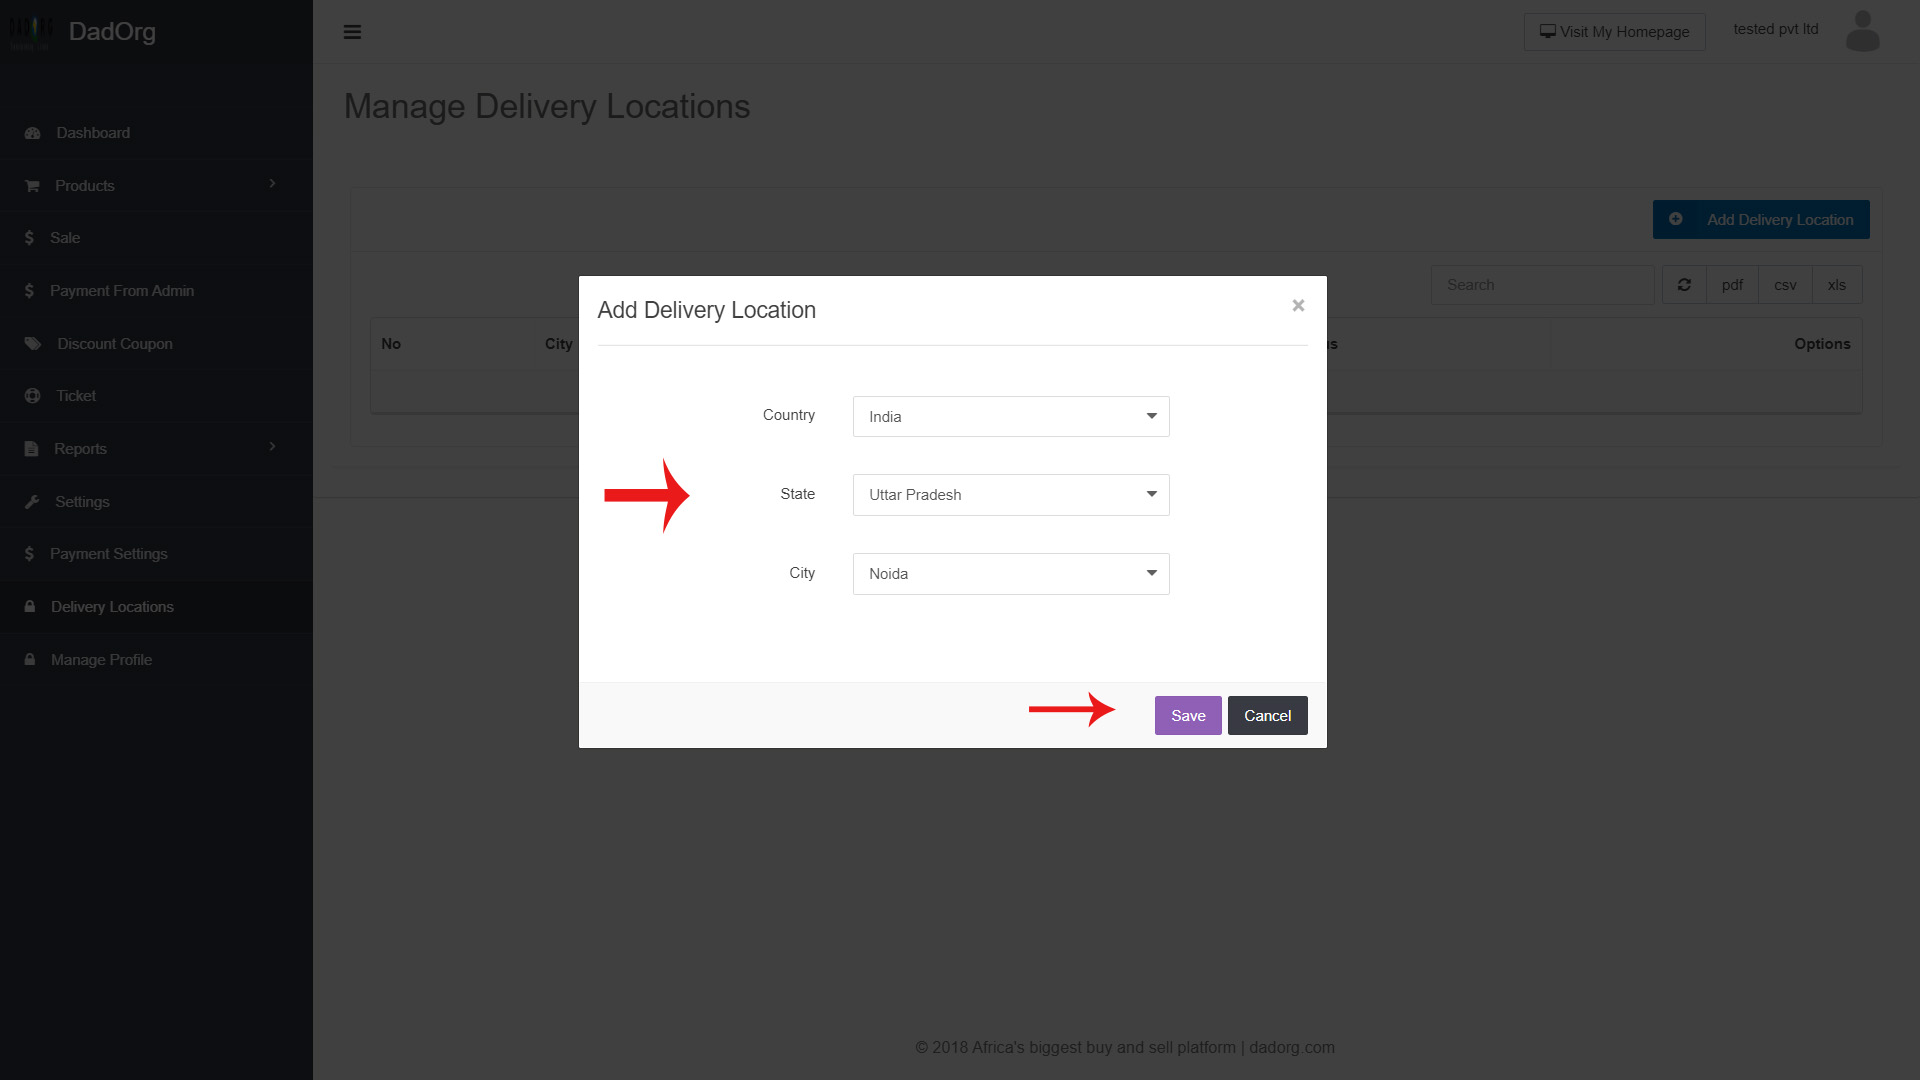
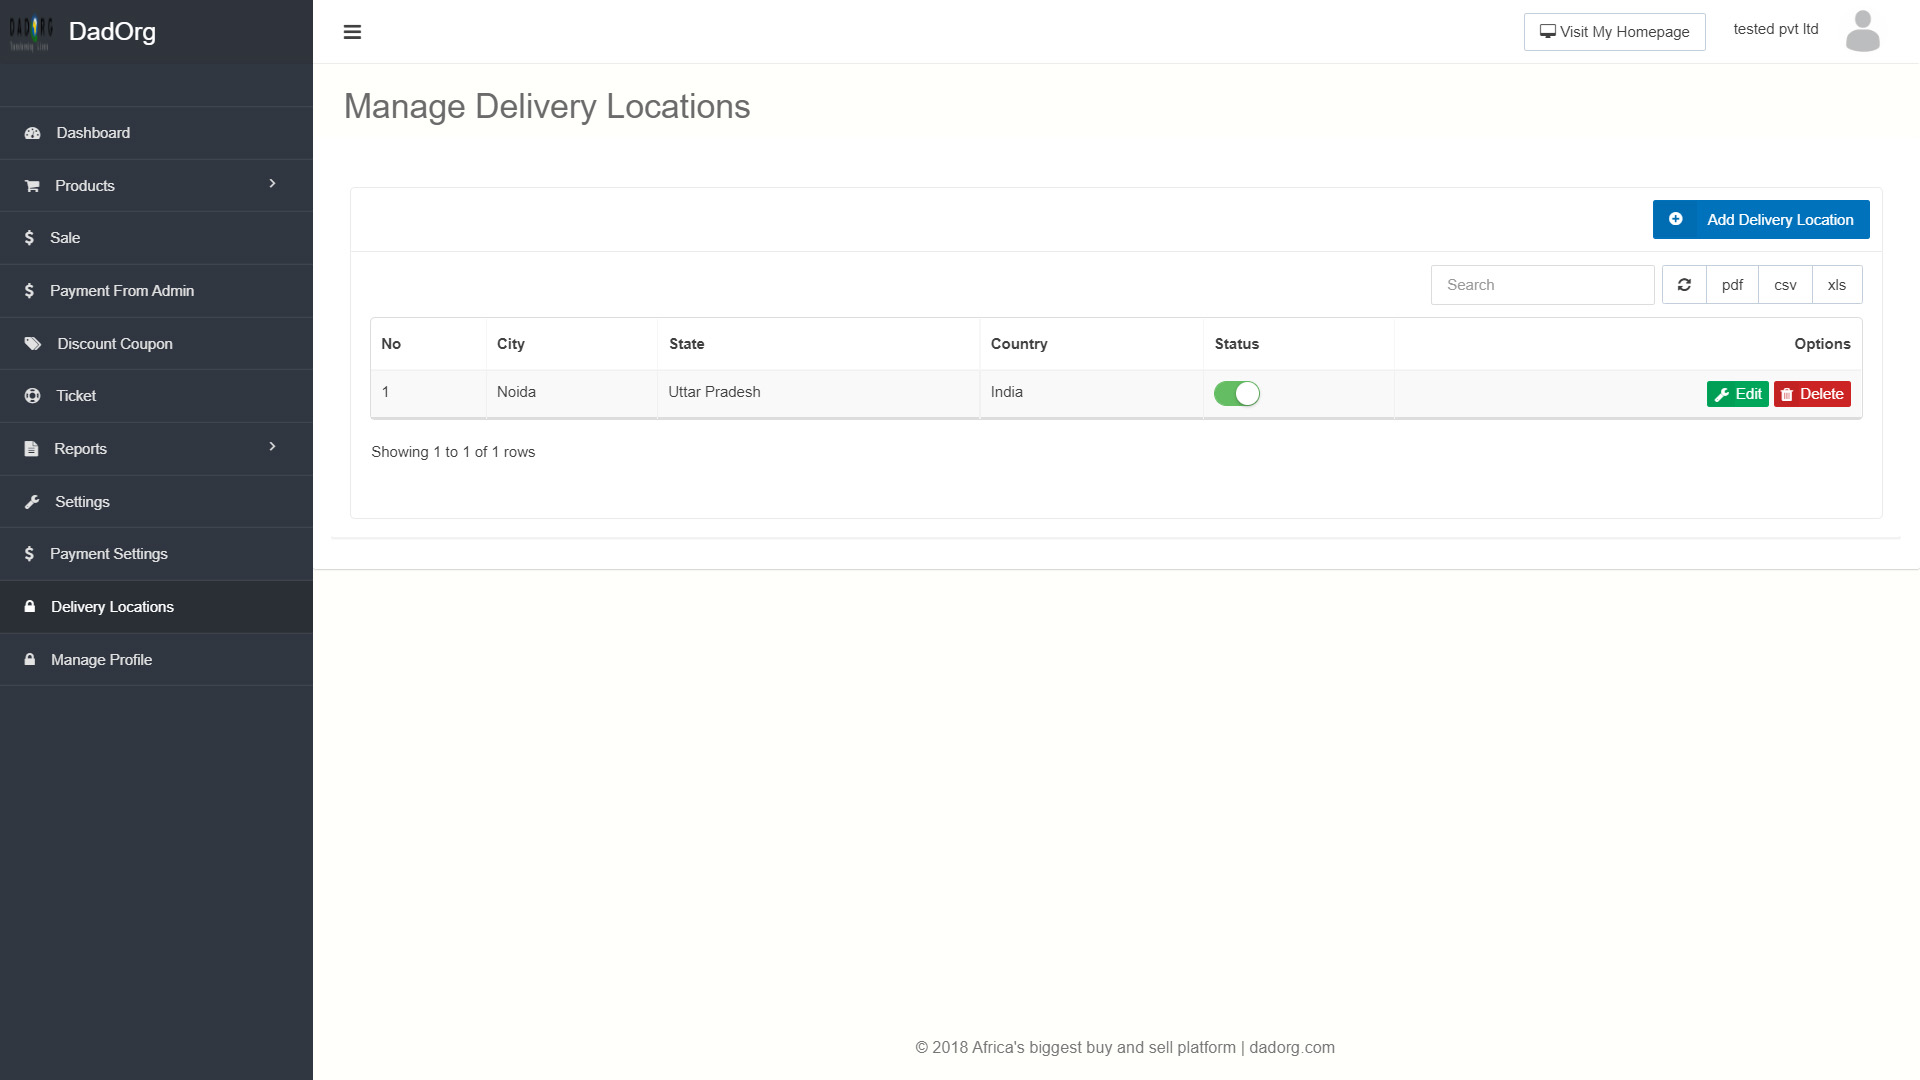
Add country, state & city from drawdown and click on save button. Then next screen will be like this:
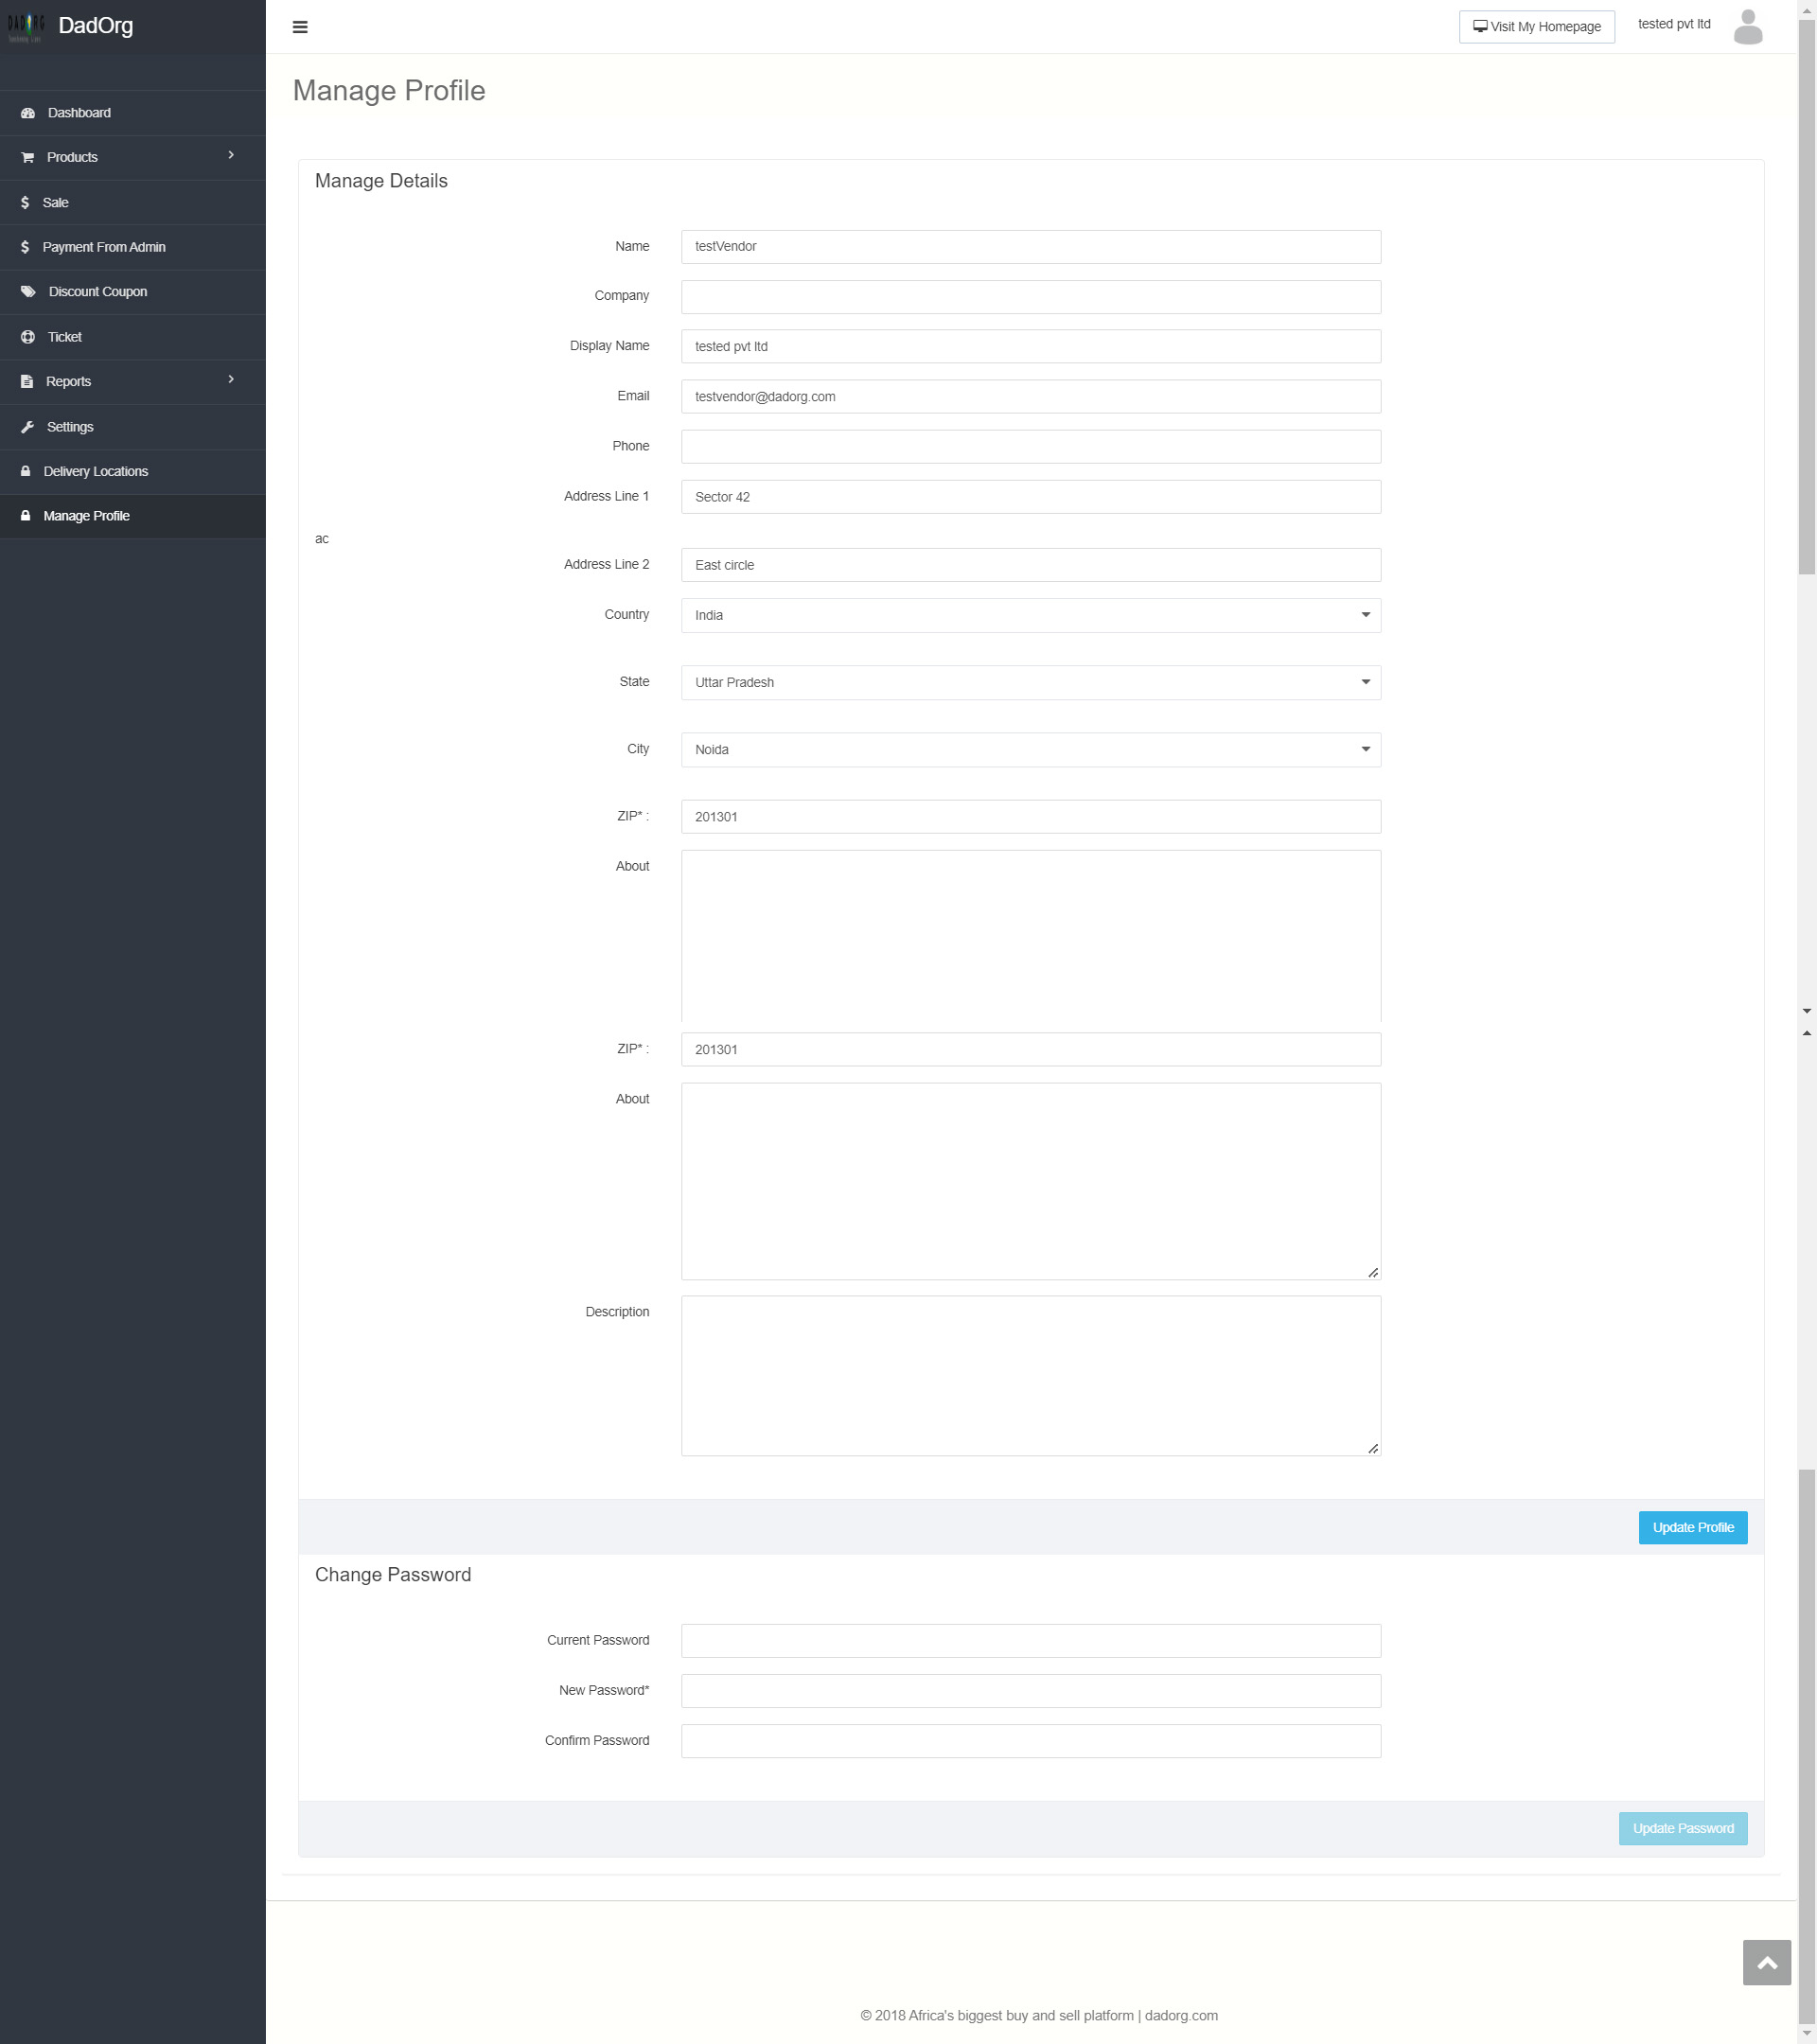
10. Manage Profile: Here there are 2 sections “Manage details” and change password. Under manage details you update your profile details and under “Change Password” you can change your login password.
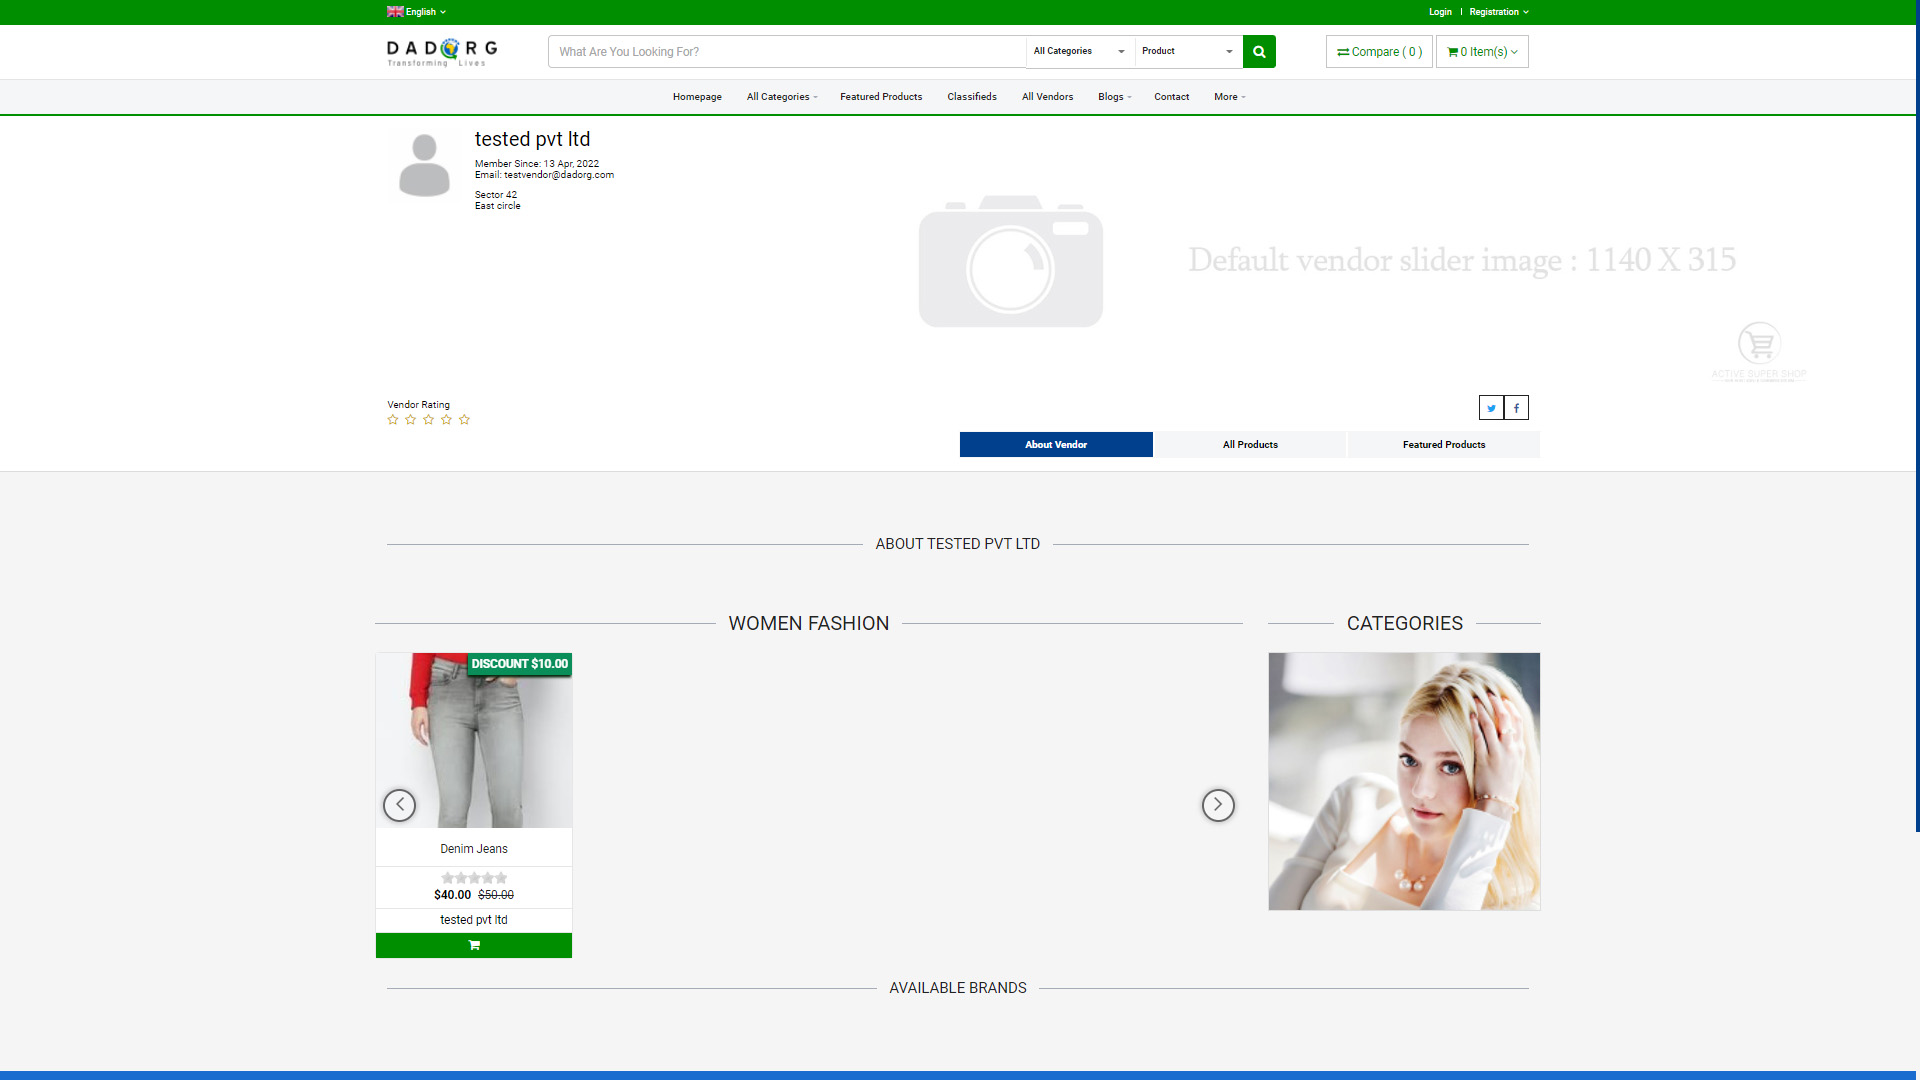
Front End look of Vendor’s Profile: Here at top right corner there is a button “Visit Home Page”. Click it you will how your profile/ company profile looks on front website.

Vendor’s profile screen will look like this.